Thursday, December 16, 2021

Pork Stew with Meatballs • Québec's Ragoût de Boulettes | Club Foody


Every year by the end of November or beginning of December, my mother sat in front of the stove toasting her flour. This was an indication she was going to make a very popular traditional Holiday dish from Québec… Pork Stew with Meatballs which in French is Ragoût de Boulettes & Pattes de Cochon!
 
This was and still is one of my favorite meals during the Holidays. Served with boiled potatoes, a generous slice of Tourtière along with Pickled Beets (and the juice from the jar), this is a great comfort food that I truly enjoy! You might think this dish is too ordinary to be on the menu for Christmas but it’s not because the secret lies in the toasted flour
 
From one household to another, this recipe is slightly different. Most people won’t even bother to toast the flour and simply buy it at the store. Others though might do the process until the color turns lightly brown. In my mother’s situation, she was toasting until it was dark in color just like the way I do. The longer it toasts, the deeper the flavors are.
 
Making Pork Stew with Meatballs • Ragoût de Boulettes & Pattes de Cochon is a long process, I won’t fool you on that but, like some recipes such as Bouillabaisse or Coq au Vin, it’s so worth it! Let’s quickly recap…
 
– When the flour is toasted and cooled, we have to sift it then set it aside. From there, we have to cook the pork hocks which take anywhere between 1 to 1:30 hours. When they’re done, the water from the pot is kept warm while we remove skin, bones and fat from the hocks and cut the meat into small pieces.
– Next, we form the meatballs and roll them in the flour. Be patient, it usually makes 100 of them!
– We’re now back to the pot, add more water (from 12 to 14 cups), bring it back to a boil and add the meat from the hocks and the meatballs. When the water comes back to a boil again, we use the rest of the toasted flour, sifting it over the pot – this helps to thicken the gravy as well as giving a nice dark color to it. We cook for 3 hours total.
– After 1:30 hours through cooking, we’ll boil water in a medium pot before adding pork sausage and cook for 10 to 12 minutes. When time is up, we remove the casings and discard them. We add the de-greased sausage links to the pot with the meat and cook for the remaining 1:30 hours. During the cooking time, it’s also important to taste and adjust the seasonings; it will probably need more salt, freshly ground black pepper as well as Mixed Spice also known in French as Épices Mélangées.
 
This is a great recipe to make ahead because it freezes so well. After the stew is at room temperature, I simply portion it into large containers and transfer to the freezer until needed. To thaw out, I put the container at the bottom of my fridge and let it sit overnight.
 
This Pork Stew with Meatballs • Ragoût de Boulettes & Pattes de Cochon brings back nice memories and this is exactly what the Holidays are all about… tradition! Bring this delicious Québec dish to your table this season…
Bon Appétit!
 
Here are other delicious Québec Holidays recipes for you to try…
– Tourtière
– Tarte au Sucre ~ Sugar Pie
– Boeuf Bourguignon (Beef Bourguignon)
– Salmon Pie
– Sucre à la Crème ~ Butter & Cream Fudge
– Old Fashioned Baked Beans with Bacon
and for even more Holidays recipes, click on this link… Recipe Category • Holidays & Events


For ingredient amounts, directions and much more, visit https://clubfoody.com/cf-recipes/pork-stew-with-meatballs-ragout-de-boulettes-pattes-de-cochon/


Don’t forget to subscribe to our YouTube channel by clicking on this link… Club Foody YouTube
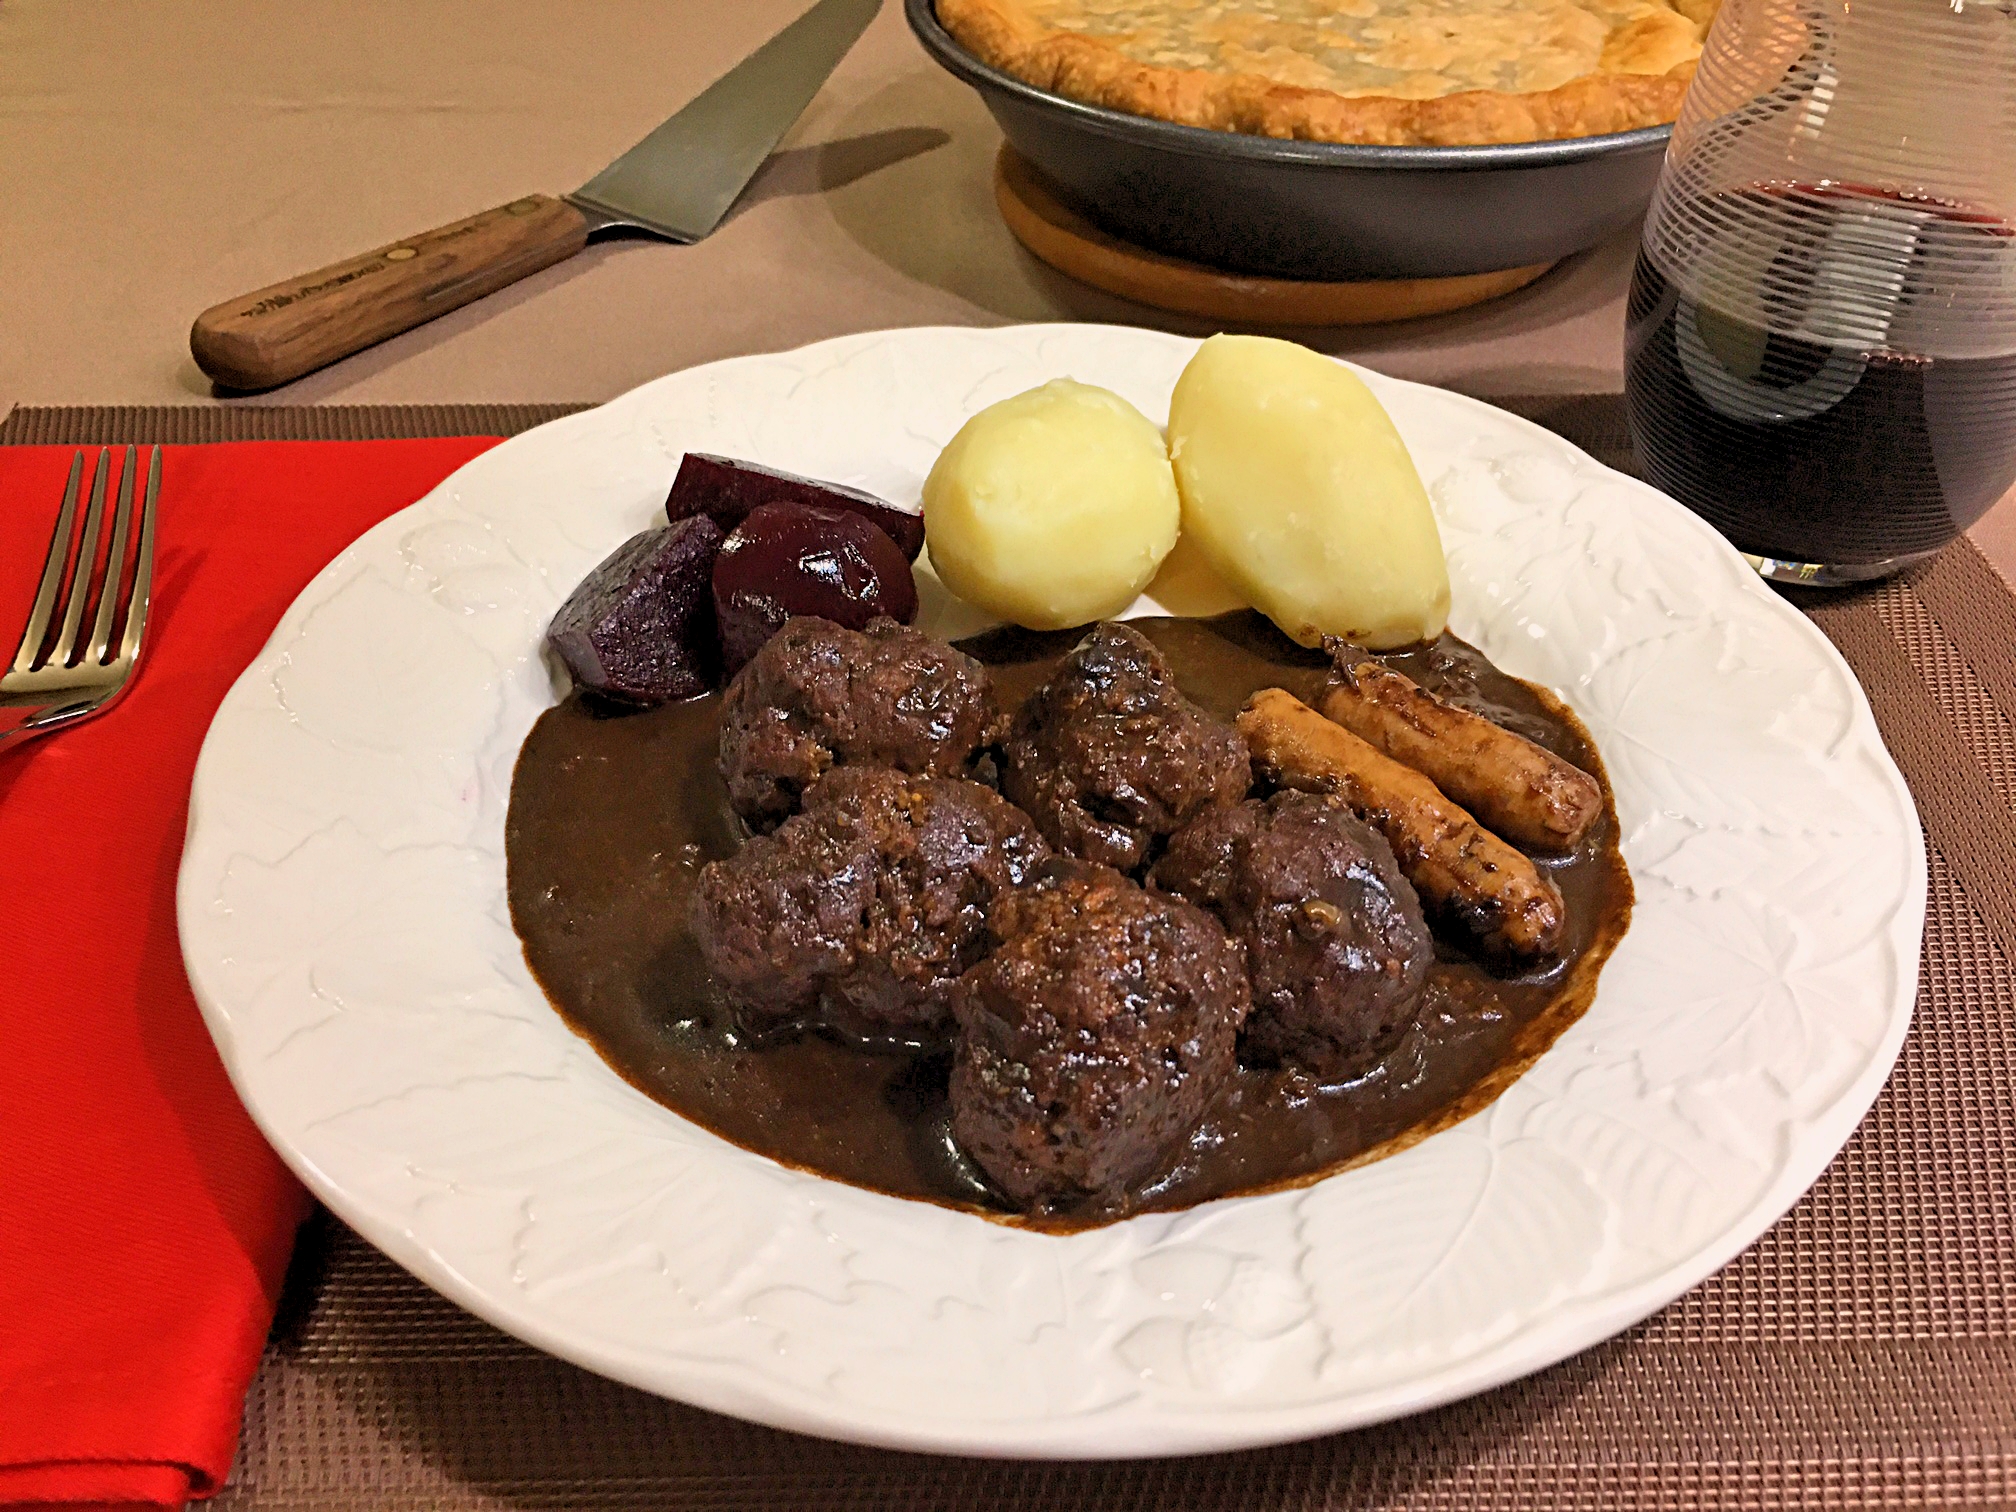
 

Ragoût de Boulettes


Tuesday, December 14, 2021

Russian Deviled Eggs Recipe • Oeufs à la Russe | Club Foody


When entertaining, we want to make sure we cover all the courses including hors d’oeuvres and bouchées. It can be as simple as a dip like Pumpernickel SpinachSix Layer ChipHummusJalapeño Bacon CheeseBaba Ghanoush or others like PâtéStuffed Dates with GorgonzolaAsian Cucumber Salmon RollsStuffed Buns, or even mini Egg Rolls… the choices are almost unlimited!
 
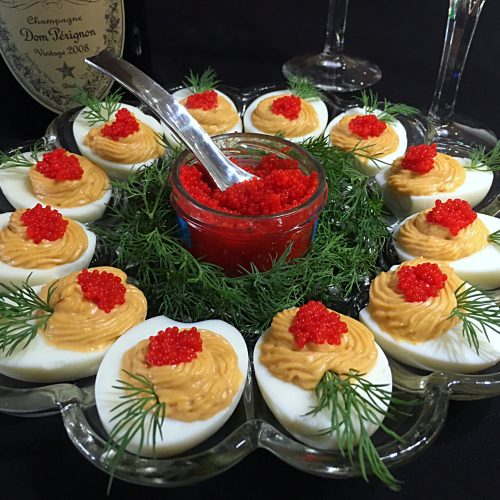
There’s one that is so popular, it’s almost on everyone‘s serving table during an event. Years ago, I decided to bring it a notch higher in the flavor department and created what I call my Oeufs à la Russe which translate to Russian Deviled Eggs! This amazing recipe is very easy plus it’s so delicious! First, I use my Russian Dressing as part of the filling. Then I garnish with red caviar and a little sprig of fresh dill. When it’s time to serve, I transfer them to my egg plate and in the center, I place a jar of caviar with a small spoon surrounded by dill in case my guests want more. Visually it’s extremely festive and elegant as well.
 
Now let’s talk about how to boil the eggs perfectly…
I take the eggs out of the fridge and let them sit on the counter for 45 minutes so they get to room temperature… that’s important. Later on, I plunge them in a pot with lukewarm water that way they don’t get shocked, cook evenly and prevent them from cracking – eggs are finicky!
 
Finally, I bring the water to a boil and as soon as it does, I put the lid on, turn off the heat and let them sit for 20 minutes. Many times I forget about it and let them sit longer. It’s totally fine and no, they won’t get rubbery by sitting in the water more than planned.
 
After 20 minutes, I transfer them to a bowl before chilling them in the fridge for about 1 hour. The reason behind that is it makes it easier to peel the shells off. If you are short on time, submerge them in an ice water bath for 15 minutes. When it’s time to peel off the shells, I roll each egg on the counter, putting enough pressure on to crack the shell before soaking them in cold water. In case you still have a hard time removing them, simply run some cold water between the shell and the outer membrane… that should do it!
 
After this is done, the rest is easy peasy! Cut the eggs in half lengthwise with a sharp knife making sure to clean the blade between each cut so it doesn’t dirty the next one. I prefer using my egg slicer… it’s quicker and I don’t have to clean anything before slicing the next egg. I transfer the yolks to a bowl before mashing them. Next, I add my Russian Dressing to the mashed yolks and stir until well blended. I use ½ cup of it for 6 large eggs… this is how I like them. Perhaps for you, it’s too much or not enough. That’s why it’s important to taste and adjust accordingly.
 
Piping the filling in makes a nice visual presentation. David – that’s right, he’s the one doing it most of the time because I’m not as good as he is – uses a 32 start tip. From there, a tiny amount of red caviar is added. In the video, I use lumpfish because my supplier didn’t have any rainbow trout. Both roes are quite affordable. There’s no need to spend hundreds of dollars using Beluga for these Russian Deviled Eggs… save them for a “very” special occasion! For the final touch, I add a small sprig of dill in the filling at the top of each egg.
 
The traditional recipe is always nice one to serve but now with this slight twist it makes a big difference, these Russian Deviled Eggs are incredible! With gorgeous, joyful colors, they will easily highlight your serving table. Just perfect for the Holidays!
Bon Appétit!
 
Check out these other delicious appetizer recipes for the Holidays…
– Duxelles Bruschetta
– Shrimp Martini with Robuchon Mashed Potatoes
– Texas Caviar
– Sardine Cups
– Easy Baba Ghanoush
– Pull-Apart Garlic Bread
and for even more appetizer recipes, click on this link… Recipe Category • Appetizers


For ingredient amounts, directions and much more, visit https://clubfoody.com/cf-recipes/russian-deviled-eggs-oeufs-a-la-russe/


Don’t forget to subscribe to our YouTube channel by clicking on this link… Club Foody YouTube
 

Russian Deviled Eggs


Saturday, December 11, 2021

Pearl Onions • Easiest Way to Peel - Tips & Tricks | Club Foody


I like rotating my ingredients and use diverse ones for my recipes. There are some ingredients that I like reserving for more “fancy” dishes like Pearl Onions. I like to use them for my Coq au VinBoeuf Bourguignon – Beef BourguignonBlanquette de Veau, Creamed Onions, Succotash, Onion Chutney, Pickled Onions, and more… Sometimes when I make my Creamed Peas dish, I like to add them at the same time as the peas. It makes it different.
 
Although they’re very cute and make a nice presentation, they’re not fun to peel… it’s a tedious task. This Pearl Onions • Easiest Way to Peel episode will show you how to accelerate the process by simply doing a couple extra steps.
 
During the Holiday season, my schedule is so hectic. Besides cooking up a storm in order to be ready for Christmas and New Year’s plus a few dinner parties at our house, I also have to make more recipes to share on Club Foody. The last thing I need is to spend extra time removing the outside paper on these little guys. Pearl Onions • Easiest Way to Peel expedites the process without getting frustrated throughout the process.
 
I use this method as well when handling cipollini which are bigger than pearl onions but still small enough to get impatient when trying to remove their papery skin. The blanching process is quick and prepping them is now a breeze.
 
Don’t get exasperated trying to remove their papery skin and watch the video on Pearl Onions • Easiest Way to Peel. It’s fast and efficient allowing you to quickly move on with your recipe.
 
Here are more useful tips and tricks for you to try…
– Brussels Sprouts Stalk- Handling and Prep
– Kiwifruits – How to Peel Quickly
– Defrosting Meats Quickly
– How to Reheat Mashed Potatoes
– Grind Chicken & Save Money
– Powdered Sugar – Make it, Don’t Buy it!
and for more handy kitchen tips and tricks, click on this link… Recipe Category • Tips & Tricks
 
Don’t forget to subscribe to our YouTube channel by clicking on this link… Club Foody YouTube


Thursday, December 9, 2021

Breakfast Casserole Recipe • Great Morning Starter! | Club Foody


In my early 20s’, I moved away from my hometown. As a matter of fact, I even changed provinces and lived in Ontario for almost 20 years. From there, I met my husband on the internet, fell in love and moved in with him in British Columbia – now that was a big gamble I took and a humongous change…
 
I’m sure there are millions of people like me who took a leap of faith either for work, love or simply to experience another life-style. I never regretted any of my decisions but the downside of this is I’ve been away from my family and friends. When the Holiday season or vacation time arrives, that is when they come and visit us. As much as I really enjoy their company, I also don’t want to get stuck in the kitchen all day long, preparing meals.
 
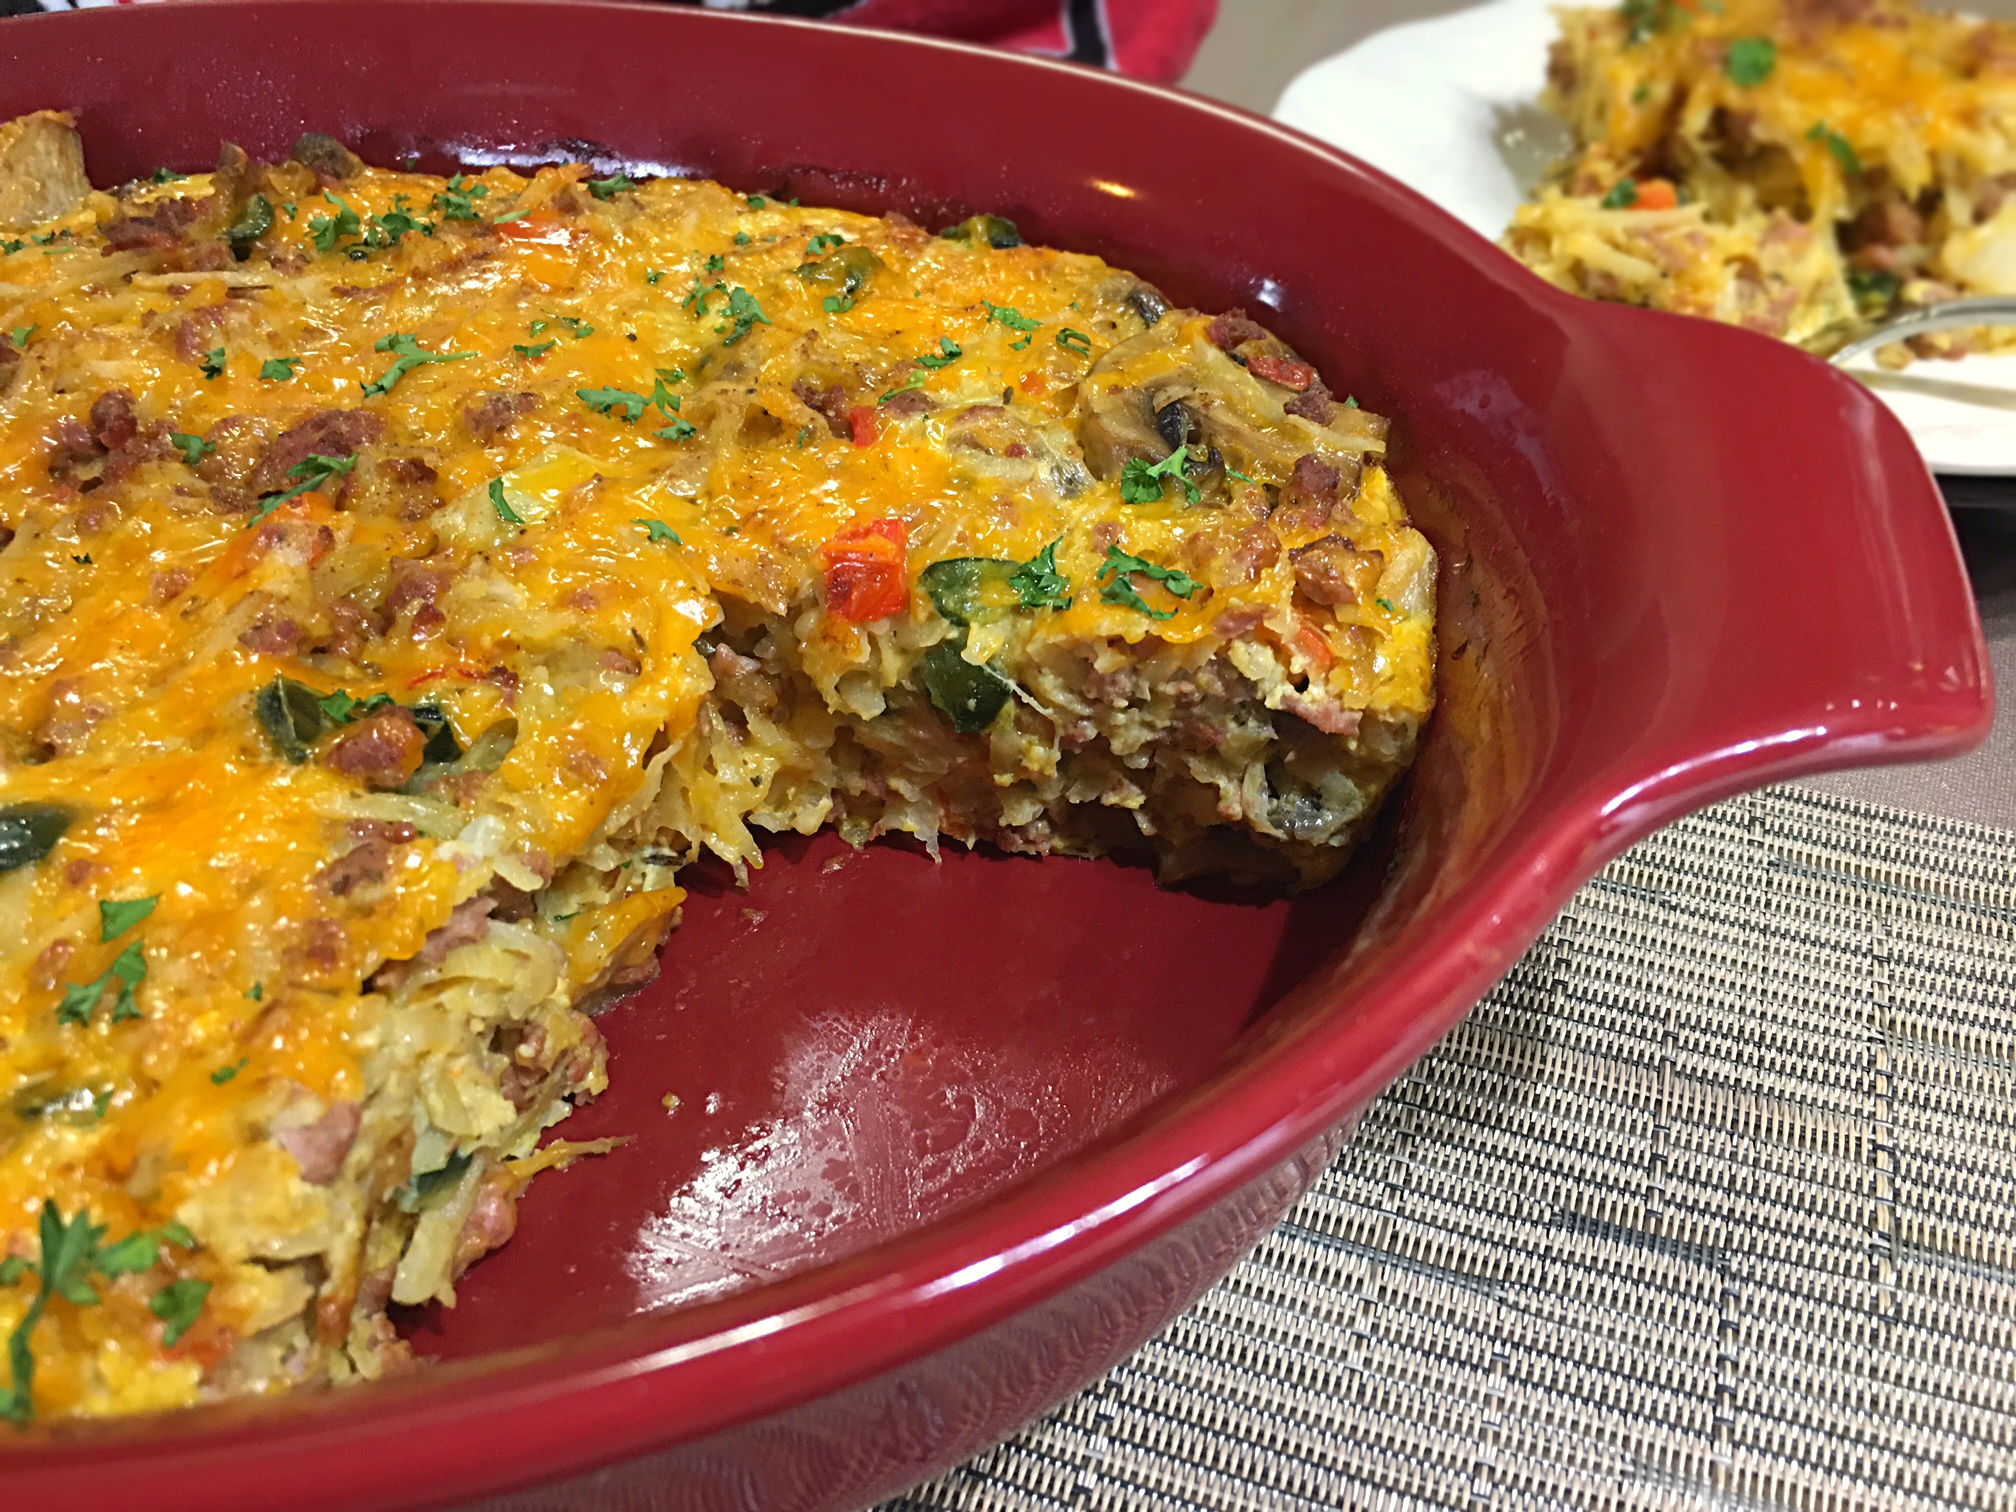
There’s a favorite of mine when it comes to the first meal of the day and it’s my Breakfast Casserole! This dish is incredibly tasty and so easy to make. What makes this one a winner is I can prepare it ahead of time and the next morning, take it out from the refrigerator and simply bake it… done!
 
An important step is to microwave the shredded potatoes prior to mixing them in with the other ingredients. The reason behind this is potatoes always take longer to cook therefore giving them a jump-start will make the whole dish ready within the baking time with all the ingredients cooked equally.
 
I use a 3-quart baking dish that I generously grease with cooking spray. Can you use butter instead? I guess you can but the rendered fat from the sausage adds a lot of flavor plus the calories. I don’t think we need to add more to this Breakfast Casserole.
 
Being a foody, I make a lot of ingredients from scratch and that includes my spices and meat. I use my homemade Italian Seasoning as well as my Hot Italian Sausage. Both can be found on the website by simply clicking on the links.
 
I love making my Breakfast Casserole for many reasons. First, when having people over and socializing, the morning after can be a little rough so by preparing the dish the day before removes that anxiety of serving food to your guests. Second, it’s incredibly delicious and so easy to make. Finally, I love the fact that I don’t have to slave in the morning to enjoy such an amazing meal with friends and family, giving me more time to relax with them… after all, they’re my out-of-town guests!
Bon Appétit!
 
Check out these other delicious breakfast & brunch recipes…
– Breakfast Sausage Muffin Cups
– Pancetta Vegetable Frittata
– Breakfast Quinoa Cereal with Mixed Berries
– Breakfast Burritos
– Soufflé Mexican Omelet
– Creamy French Eggs
and for even more breakfast recipes, click on this link… Recipe Category • Breakfast & Brunch


For ingredient amounts, directions and much more, visit https://clubfoody.com/cf-recipes/breakfast-casserole/


Don’t forget to subscribe to our YouTube channel by clicking on this link… Club Foody YouTube
 

Breakfast Casserole


Tuesday, December 7, 2021

Shrimp Martini with Robuchon Mashed Potatoes Recipe | Club Foody


Seafood… yum! I love them all! Each has their own unique taste and texture. From scallops to oysters, to lobsterclams, shrimp, mussels, calamari, crab and so on, they’re all a feast to me! Since I was a child, I’ve always considered seafood as a delicacy, a nice delicious treat and I still think that way. I use them a lot throughout the seasons but more so during the Holidays…
 
When it comes to shrimp (or prawns), I have many recipes that I use this particular protein in like my Paellas (Marisco and Spanish), Shrimp Po` BoyCajun PoutineNew Orleans GumboShrimp Salad SandwichCreamy Shrimp LinguineBouillabaisse à la MarseillaiseCreole Shrimp & Andouille SkewersSeafood PizzaShrimp Maque ChouxCrab Louie SaladVietnamese Summer RollsPrawn Saganaki, etc.
 
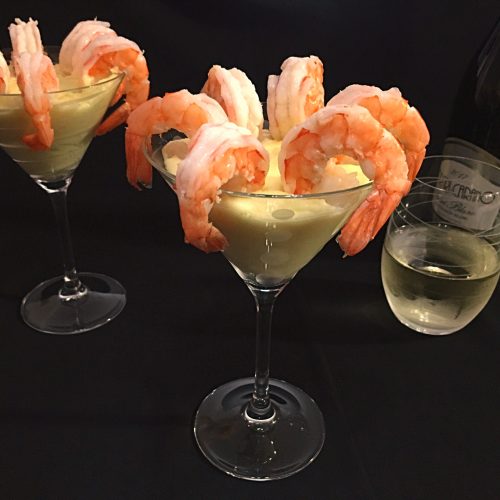
Shrimp Cocktail is another way to enjoy these tasty little guys. This popular appetizer is always served with a nice delicious Cocktail Sauce. What if I told you that there’s another delicious way to enjoy them? Here’s my Shrimp Martini with Robuchon Mashed Potatoes!
 
What? Shrimp with mashed! Absolutely! The combination is phenomenal! What makes this dish so incredible is that I don’t use regular mashed potatoes… no, no, no! I use Joël Robuchon’s recipe! Without his purée de pommes de terre, this combination wouldn’t be so amazing. These are the best mashed potatoes ever! They’re so rich, light, unbelievably creamy and buttery! This most awarded Michelin-star chef took potato purée to new heights of yumminess! As “strange” as it sounds, this Shrimp Martini with Robuchon Mashed Potatoes is the perfect pairing!
 
Who is this guy? – you may ask. He was a French chef who impacted la gastronomie Française. He was my idol! I discovered him when I came across a French European television show called “Bon Appétit Bien Sûr”. Just by watching him and his enthusiasm, I was salivating! Joël Robuchon was named “Chef of the Century” by the influential restaurant guide Gault Millau in 1989 as well as holding 32 Michelin Guide stars – that’s the most of any well-known chef in the world… now that should tell you something. The only one who comes close to him is Alain Ducasse, holding 17 Michelin Stars. Robuchon was also awarded as “Meilleur Ouvrier de France” (France’s Best Worker).
 
Creating incredible dishes, he truly influenced the culinary world and he sure did with me. There’s a line he said that changed my way of cooking forever and it was “There’s no such thing as a perfect dish – one person can always do better”. This is so true! How many times I thought “yes, this is it, everything tastes perfect!” until I revisit and improve it once again.
 
Here’s a fun fact… Among the many chefs he trained over the years, Gordon Ramsay was one of them. After he made langoustine ravioli, Robuchon disliked it and threw the dish back at him. Insulted, Gordon took off his apron, left the kitchen and never came back. Rest assured, later on, these two were actually good friends and apparently joked a lot about that incident. Spending over 60 years of his life cooking, this passionate chef passed away 3 years ago… it was a big loss for the Gastronomy World!
 
With all the gorgeous dishes that he created (and improved), one of them stands above and it’s his mashed potatoes. As simple as the dish is, he improved it so much by adding a lot of butter and heavy cream. You might think “okay, that’s all”. Actually it’s beyond that… The end result is the BEST purée de pommes de terre you’ll ever have!
 
The first time I made his, I was stunned! The creaminess and lightness of the side surprised me enormously! I wasn’t expecting such a nice delicate side. This is when the idea of pairing it with Poached Shrimp came up. The mix of cold, perfectly cooked shrimp dipped in nice steamy warm, mashed was born. This was a match made in heaven!
 
This Shrimp Martini with Robuchon Mashed Potatoes is certainly astonishing and deliciously different! The crunchy and delicate taste from the shrimp along with the buttery, creamy and light mashed will elevate your taste buds to the next level! This perfect bite of yumminess will surprise you!
Bon Appétit!
 
Here are more delicious appetizer recipes for you to try…
– Sweet Chili Chicken Bites
– Spanakopita
– West Coast Smoked Salmon Chowder
– Caesar Salad
– Duxelles Bruschetta
– Coquilles St Jacques
– Easy Falafel
and for even more seafood recipes, click on this link… Recipe Category • Seafood & Fish


For ingredient amounts, directions and much more, visit https://clubfoody.com/cf-recipes/shrimp-martini-with-robuchon-mashed-potatoes/


Don’t forget to subscribe to our YouTube channel by clicking on this link… Club Foody YouTube
 

Shrimp Martini with Robuchon Mashed Potatoes


Thursday, December 2, 2021

Asian Peanut Chicken Curry Recipe • Sweet & Spicy Dish | Club Foody


Many of my recipes were created because I wanted to salvage what was left in the fridge. I can’t stand wasting food… I was brought up that way, what can I say! This is exactly what happened with my Asian Peanut Chicken Curry! I had a couple of pounds of chicken thighs, a large zucchini, peppers and an onion in the refrigerator. After bouncing a few ideas off David, the recipe was created!
 
With a beautiful combination of sweet, sour and a bit of heat, this Asian inspired dish is so tasty. It’s really not a complicated recipe and a delicious change from your regular menu. When it comes to the spiciness, I use a bird’s eye pepper but if you can’t handle heat, simply omit it. The same applies to the topping when you’re ready to serve.
 
Another source of “heat” comes from the sweet chili sauce. It’s a little zippy but not overly. I used my homemade recipe so to get it, click on the link. An unorthodox ingredient that I also use is ketchup. Perhaps some of you might lift your eyebrows but frankly, it brings a little extra sweetness to this Asian Peanut Chicken Curry!
 
When it comes to the peanut butter, I add the amount to a Pyrex measuring cup and then microwave it on High for 30 seconds. This will bring it to the liquid form. David and I like unsalted roasted peanuts but please feel free to use your preferred ones.
 
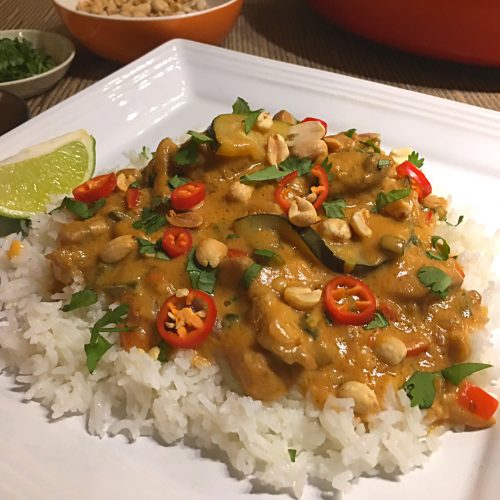
This Asian Peanut Chicken Curry is amazingly flavorful! Served over rice and topped with roasted peanuts, cilantro, red pepper slices and garnished with a lime wedge, this is a recipe that will definitely please your taste buds.
Bon Appétit!
 
Here are several more delicious Asian inspired recipes for you to enjoy…
– Dakgangjeong – Sweet & Spicy Crispy Korean Chicken
– Singapore Noodles
– Moo Shu Pork Tortillas
– Japanese Chicken Soba Noodles
– Spicy Pork Gyoza
– Chinese 5 Spice Spare Ribs
and for even more chicken recipes, click on this link… Recipe Category • Poultry


For ingredient amounts, directions and much more, visit https://clubfoody.com/cf-recipes/asian-peanut-chicken-curry/


Don’t forget to subscribe to our YouTube channel by clicking on this link… Club Foody YouTube
 

Asian Peanut Chicken Curry