Tuesday, November 9, 2021

Hash Brown Potatoes Recipe • Delicious American Side Dish | Club Food


Good news travels fast and so does recipes for delicious dishes… There are recipes like Onion Soup that date back to Roman times! Of course, it’s been modified a lot throughout the centuries until the more modern French version. There are some that were created more recently like Caesar Salad during prohibition in Tijuana (Mexico), Fettuccine Alfredo in the 1950’s in Rome or the scrumptious dessert named after the famous ballet dancer Anna Pavlova back in the 1920’s – when it comes to this one, the title for the creation has been debated between Australia & New Zealand so let’s no go there!
 
There are also other recipes from the 19th century that are still enjoyed around the world these days like Oysters Rockefeller (New Orleans), Beef Stroganoff from Russia, Eggs Benedict or Lobster Newberg apparently both created at Delmonico’s in New York, Cherries Jubilee that Auguste Escoffier prepared in honor of Queen Victoria’s Diamond Jubilee celebration (England), and so on including this popular breakfast side dish… Hash Brown Potatoes!
 
This delicious American creation is still a common food item served today! These grated fried potatoes are the perfect match to go with morning bacon and eggs although many restaurants started serving this side dish with burgerssteaksgrilled chicken, etc.
 
Making Hash Brown Potatoes from scratch is so easy. Russets or other starchy potatoes work the best for making this side. The hardest part is grating them… After that, we simply rinse and place them in clean, thin dish towel and squeeze as much liquid out as possible. This will produce extra crispy potatoes. Extracting the moisture is the “key” for perfect homemade hash browns! From there, they can be seasoned and fried with fat in a heavy bottomed skillet spreading them out in a thin layer.
 
Now let’s talk about the fat. I use bacon fat. Every time I cook bacon, I simply reserve the fat for later use. Can you use duck fat? Sure but let’s be honest… These are breakfast potatoes and I like to reserve my duck fat for more upscale recipes like my Duck Fat Roasted Potatoes plus bacon fat is more readily available and also cheaper. Regular oil can be used but what a shame! As I mentioned, keep your bacon fat in the fridge for recipes like this one…
 
Similar to Latkes, these delicious brown and crispy Hash Brown Potatoes are a nice easy recipe to make and a great addition for your breakfast or brunch! Making them from scratch is tastier and definitely a must try this coming weekend…
Bon Appétit!
 
Here are more scrumptious potato recipes for you to try…
– French Fries
– Twice Baked Potatoes
– Scalloped Potatoes
– Tex-Mex Potatoes
– Moroccan Potato Salad
– Potato Skins
– Cottage Fries
and for even more breakfast recipes, click on this link… Recipe Category • Breakfast


For ingredient amounts, directions and much more, visit https://clubfoody.com/cf-recipes/hash-brown-potatoes/


Don’t forget to subscribe to our YouTube channel by clicking on this link… Club Foody YouTube


Thursday, November 4, 2021

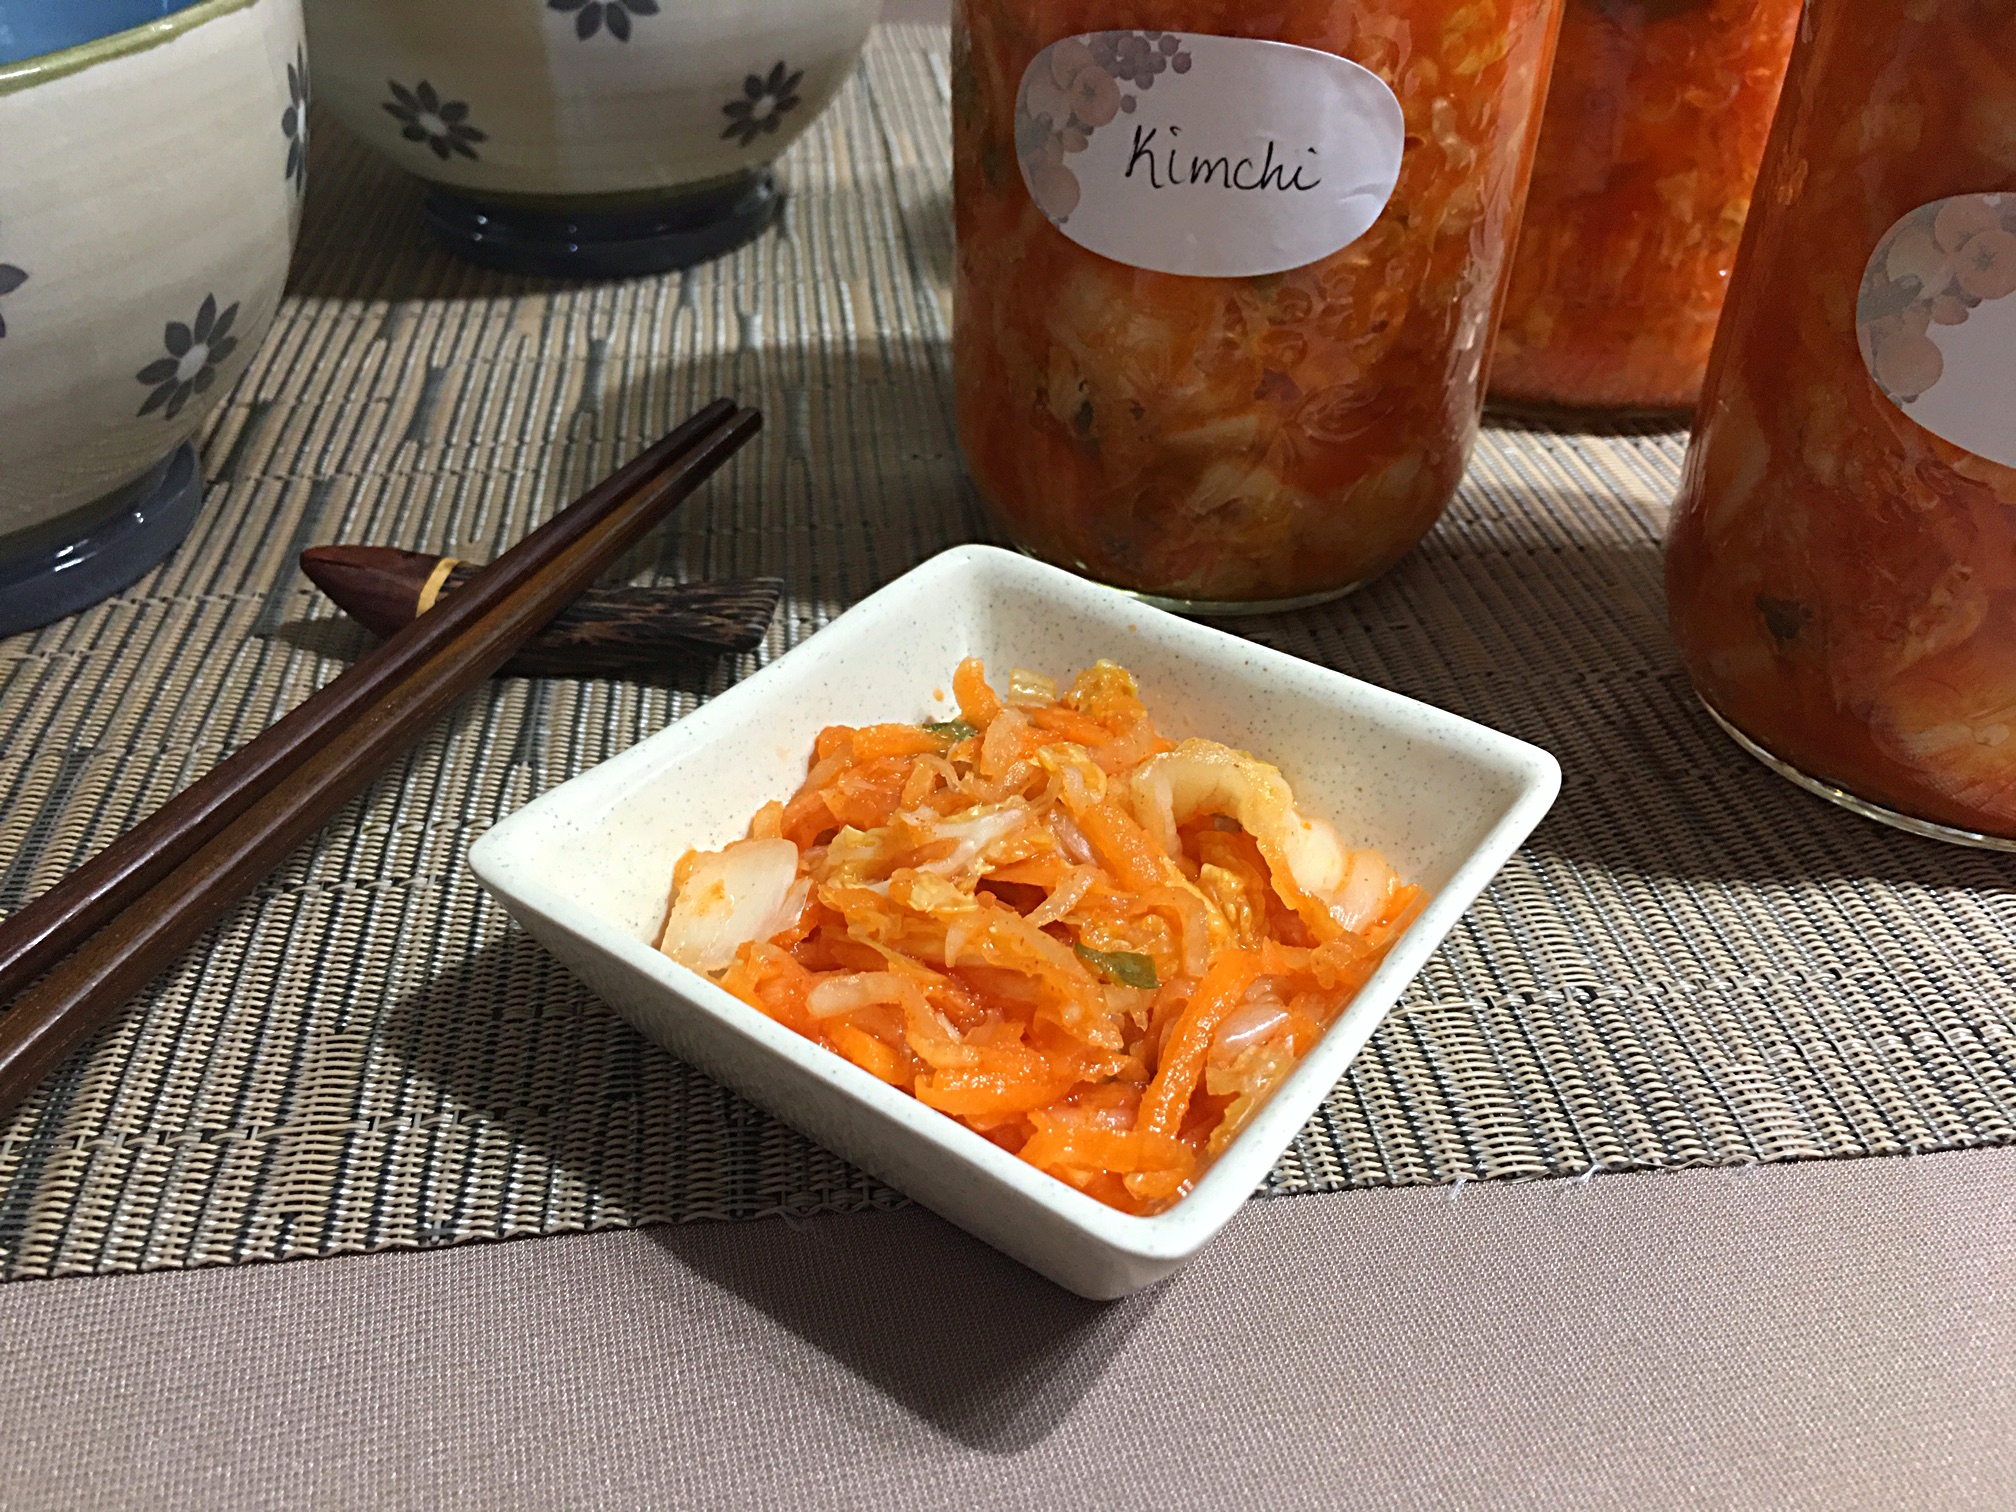
Kimchi Recipe • A Popular Korean Side Dish! | Club Foody


In the last 50 years, North America has been introduced to so many foreign dishes and ingredients. When it comes to Asian cuisine, the list is quite interesting: Char Siu Pork, Sushi, General Tso’s Chicken, Shan Noodles, Dakgangjeong, Beef Rendang, Satay with Peanut Sauce, Dim Sum, Summer Rolls, Phở, Pad Thai Noodles, Bánh mì, and others including a wide array of desserts, drinks & beverages like Pichi-Pichi, Sweet Sticky Mango Rice, Pisang Goreng, Sake, Plum Wine, Chang Beer, Cà phê sữa đá (Vietnamese Iced Coffee), Soy milk, Bubble Tea, etc.
 
Korean cuisine has a gorgeous array of flavorful recipes like Bulgogi BBQ, Dakgangjeong, Jeon, Beef Bibimbap, Yakgwa, Hotteok (a favorite of mine), and many more but there’s one that surpasses all of them and it’s Kimchi!
 
If you are unfamiliar with it, this is THE most popular side dish in Korean cuisine. Actually it’s more than that… it’s the heart and soul of Korean cooking! This dish accompanies almost every Korean meal and it says that a “dinner without Kimchi is considered incomplete”. With a nice mix of fresh produce, this is a great condiment that pairs well with many dishes.
 
This traditional side dish fermented in brine is a standard food item consumed in Korea. Depending on the region, different ingredients are used when it’s made. In my version, I use Napa cabbage, carrots, daikon, apple (my personal touch), ginger, garlic, green onions along with a spicy paste.
 
Daikon… what’s that? It’s basically a “white” radish consumed throughout Asia. It’s the milder and sweeter side of our typical red radishes. Before using this root vegetable, make sure to peel it just like a carrot. Sometimes called winter radish or Oriental radish, this is a produce you should add to your diet as it enhances dishes so nicely. It’s a great addition for salads or slaws.
 
An important ingredient for the making of Kimchi is the red chili paste called gochujang. This is a sweet & spicy fermented condiment used a lot in Korean cuisine. I use this condiment when I make my Dakgangjeong or for my Bibimbap but it can also be added to soups, sauces and stews.
 
Kimchi is a great side dish to have on hand. Besides an accompaniment, it can be used in many recipes like Kimchi Bibim Guksu (Spicy Cold Noodles), in pancakes, dumplings, rice like Kimchi Bokkeumbap, or even on pizza. If you enjoy this Korean food item, you can now make it at home…
Bon Appétit!
 
Check out these other great side dish recipes…
– German Spätzle
– Pisto Manchego
– Moroccan Potato Salad
– Saffron Rice Stuffing
– Mac and Cheese
– Easy Baba Ghanoush
– Carrot & Rutabaga Mash
and for even more International recipes, click on this link… Recipe Category • Condiments


For ingredient amounts, directions and much more, visit https://clubfoody.com/cf-recipes/kimchi/


Don’t forget to subscribe to our YouTube channel by clicking on this link… Club Foody YouTube
 

Kimchi


Tuesday, November 2, 2021

Green Onion Pizza Dough Recipe • Deliciously Different! | Club Foody


I’ve always enjoyed pizzas but my love for them increased when I started making them from scratch and I mean everything including the crust. Frankly I was nervous the first time I made pizza dough. Unsure on how it would turn out, I rolled up my sleeves and made one. Surprisingly it was delish and tasted better than any others out there! The only thing I found overwhelming was the kneading part but I got used to it. The more dough I was kneading and rolling, the easier it became. When I got my stand mixer, making pizza dough from scratch was now a breeze…
 
So far I’ve posted my Cheesy-Herb and Rustic Italian. Another one I’m sharing with you today is my Green Onion Pizza Dough! This creation came out after harvesting our onions at the end of the season. We had so many I didn’t know what to do with them. After adding some in mashed potatoes and as an ingredient in recipes, there was still a big bunch sitting in the crisper. The light bulb went off and this is how I came out with this original recipe…
 
The taste is very subtle and doesn’t overtake the topping ingredients. It gives just enough onion flavor to make it interesting. It’s colorful and a great change from plain Jane pizza dough. Trying to be as objective as I can, I really think it’s an easy recipe. If you’re a foody then there’s no doubt you have to try to make this dough…
 
When I filmed this recipe, I used this Green Onion Pizza Dough for my Caribbean Jerk Chicken Pizza which is coming out on February 24th, 2022. The combination was perfect… Like with any of my homemade pizza doughs, the right temperature to bake your pie is at 500ºF. Depending on which toppings you’ll be using, baking time can vary between 8 to 13 minutes. If you go beyond that, the crust might start getting too dark.
 
Don’t let yourself be intimidated trying to make pizza dough. It’s really easy and such a personal reward plus the taste of fresh dough is sublime! Try this flavorful Green Onion Pizza Dough on your next “pizza night”… you’ll be delighted!
Bon Appétit!
 
Check out these delicious pizza recipes…
– Sombrero Pizza
– Quattro Formaggi Pizza – Four Cheese Pizza
– Meat Lovers Pizza
– Greek Pizza
– BBQ Pulled Pork Pizza
– Seafood Pizza
– Hawaiian Ham Bacon Pizza
– Chipotle Chicken Tortilla Pizza
– Calzone
and for even more pizza and pasta recipes, click on this link… Recipe Category • Pizza & Pasta


For ingredient amounts, directions and much more, visit https://clubfoody.com/cf-recipes/green-onion-pizza-dough/


Don’t forget to subscribe to our YouTube channel by clicking on this link… Club Foody YouTube


Thursday, October 28, 2021

Puffed Wheat Squares Recipe • Tasty Canadian Sweet Treat! | Club Foody


Wow, October is almost over – can you believe it? Before saying goodbye to it, there’s a big Holiday coming up this weekend and it’s Halloween! As much as kids have fun with it, wearing “scary” costumes and make-up, going door-to-door and getting a bunch of candies, adults also enjoy the event! I remember having parties over at my place and displaying all sorts of “creepy” props around the house with some dry ice smoking. On top of that, there were games to play, spooky cocktails & unappealing food served, and of course great music!
 
This year we’re not doing much at all but still, this is the perfect excuse to make some sweet treats at home like Bounty Chocolate BitesReese’s Peanut Butter CupsDulce de Leche TurtlesCrunchie Bars, etc. Trick or treat, I thought I should make something that my husband’s loved since childhood and it’s Puffed Wheat Squares!
 
I never had them before I met David and I’m glad he introduced me. It’s such a great snack to enjoy! Using a good quality cocoa powder, some Corn Syrup and a few more ingredients, this is the perfect quick treat to make for this weekend. Just some warning… they’re addictive and disappear fast! I bet you can’t stop at having just one!
 
Although it’s very easy to make these Puffed Wheat Squares, there are a couple of things to keep in mind. Cooking time is an important one! First you can’t let the mixture boil too long otherwise the moisture will escape and you’ll end up with hard, dense squares. The best way to test if it’s is done is by dropping a tiny amount of the mixture into a small bowl of very cold water. If it seizes then it’s done. I use the same technique when I make Sucre à la Crème – Butter & Cream Fudge. The other thing is after it’s cooked, add the cereal right away and stir until well coated. If you let the mixture sit too long, it will be harder to stir in the cereal.
 
These Puffed Wheat Squares are a great Canadian treat! It’s right up the same alley as Pouding Chômeur, Butter Tarts, Tarte au Sucre – Sugar Pie or Flapper Pie, Nanaimo Bars, Beaver Tails, Blueberry Grunt, and so on. If you need an excuse to make a delicious and easy treat for Halloween, give this recipe a try…
Bon Appétit!
 
Check out these other delicious snack recipes…
– Cranberry Cream Cheese Crisp
– Spicy Holiday Chocolate Bark
– Energy Berry Bites
– Ooey-Gooey Cinnamon Buns
– Sesame Snaps
– Pumpkin & Spice Cream Cheese Muffins
– Chocolate Chip Cookies
and for even more chocolate recipes, click on this link… Recipe Category • Chocoholic


For ingredient amounts, directions and much more, visit https://clubfoody.com/cf-recipes/puffed-wheat-squares/


Don’t forget to subscribe to our YouTube channel by clicking on this link… Club Foody YouTube


Tuesday, October 26, 2021

Filet Mignon • How to Cook Perfectly! | Club Foody


I’m definitely a real carnivore; from beef to pork, lamb, poultry including venison and game like bison, rabbit, ostrich, elk, etc., I love them all! When it comes to beef, my favorite cut is tenderloin. This is the most tender and lean part of the animal therefore the most expensive cut of beef. I use the center-cut for my Beef Wellington and Chateaubriand. I simply slice the filet into portions and make steaks with it. The small end of the tenderloin which is referred to as the “tail” or “tip” is the tenderest part of the cut. Due to the inconsistency of the size, this part is perfect to use for a nice Steak Tartare, Stir Fry, Steak Salad, Beef Stroganoff, etc.
 
During the summer time, David and I enjoy grilling our steaks on the barbecue but when the coldest months come, I simply grill them on the stove then finish them in the oven. This Filet Mignon • How to cook Perfectly episode is the simplest method to achieve great results with your steaks. It’s really not that complicated and quite fast too.
 
When I was living in Toronto, I briefly worked for a large high-end American steakhouse chain. Wandering into the kitchen, I made the comment to the head chef about the anticipation of the warm weather to come back so I could grill my steaks outside. He looked at me and asked why. I explained that I didn’t know how to cook them inside. He told me to show up before my shift the next day so he can show me the “inside method”. That was so awesome! I was now able to enjoy my Filet Mignon • How to Cook Perfectly all year round!
 
Throughout the years, I did a few experiments. First the steaks have to be at room temperature – it usually takes about 30 to 40 minutes – before going into the hot cast iron pan. Well I decided to go a step further. After the steaks are at room temperature and patted dry with paper towels to remove any moisture which helps them to get a nice crust, I season very well with salt & pepper before transferring them to the fridge for 24 hours. That’s right, a full day! I take them out and let them get back to room temperature again. You won’t believe how amazingly tender the steaks are. Of course, if you are pressed for time, forget about it and stick to the 30-40 minute passive time.
 
The 7 steps for Filet Mignon • How to Cook Perfectly are simple.
– First, the cast iron pan is heated on high-heat for a couple minutes – you’ll know when it’s hot enough by placing your hand an inch above.
– Add flavorless oil (canola, grapeseed, sunflower or vegetable) and let it start shimmering. When a tiny bit of smoke rises up
– Place the well-seasoned filets in the pan and let them sit for 2 ½ to 3 minutes, undisturbed – I’m not kidding… DON’T touch them. This is how we get that gorgeous crust also known as a Maillard reaction.
– From there, flip them. If the filets don’t release from the pan, let them sit a little longer.
– To enhance the flavor (highly recommended), add butter, garlic cloves and either a sprig of rosemary or thyme. You can discard the cloves and use Garlic Butter instead… yum! We tilt the pan and baste the filets with the butter mixture, spooning it on a few times, before transferring to the oven.
– Transferring the cast iron pan to a 450ºF preheated oven. Cook until desired doneness (refer to chart below).
– Remove from the heat and let them sit for 10 minutes before serving or slicing so the juices have time to redistribute… voilà!
 
When I serve my Steak Diane or Steak Oscar, this is the method I use. It’s quick and easy and you’ll be surprised how amazing the steaks taste. Filet Mignon • How to Cook Perfectly will help you prepare delicious steaks to enjoy all year round…
Bon Appétit!
 
CHART:
RARE> 5-6 minutes cook time = 120ºF and the final temperature after resting = 125ºF
MEDIUM RARE> 6-7 minutes cook time = 130ºF and the final temperature after resting = 135ºF
MEDIUM> 7-8 minutes cook time = 140ºF and the final temperature after resting = 145ºF
MEDIUM WELL> 8-9 minutes cook time = 150ºF and the final temperature after resting = 155ºF
WELL DONE> 9-10 minutes cook time = 160ºF and the final temperature after resting = 165ºF
 
Check out these other great BBQ & grilling recipes…
– Greek Ouzo Pork Kebabs
– Hawaiian Teriyaki Burgers
– Chicken Chapli Kebab
– Fire Roasted Salsa
– Turkish Kebabs
– Tex-Mex Potatoes
– Rotisserie Chicken
and for even more beef recipes, click on this link… Recipe Category • Beef


For ingredient amounts, directions and much more, visit https://clubfoody.com/cf-recipes/filet-mignon-how-to-cook-perfectly/


Thursday, October 21, 2021

Holiday Fruitcake Recipe • This isn't your Grandma's cake! | Club Foody


An important thing that makes one relationship better than another is the commonality. The more things individuals have in common, the deeper and stronger the connection becomes. David and I are fortunate to share most of our likes and dislikes. There are a few we don’t agree on and one of them is a popular dessert… Holiday Fruitcake!
 
Our 1st Christmas was so exciting! Getting ready for the celebrations, we decorated, shopped, cooked and planned together. One day while we were out grocery shopping, I was surprised by something he didn’t like. As we got to the bakery section, I saw fruitcakes on a stand. As I was reaching for one to put in the shopping cart, I saw David making a funny face. I asked him what that was all about and he said that he never liked them. Although slightly disappointed (I really like this kind of cake), my brain started to figure out a way to help make him enjoy a long time Holiday favorite of mine. Sure enough, the year after, I was giving my first fruit cake a try…
 
This is one of those recipes that cannot be rushed. If you want a deep, rich flavorful cake, time is the key ingredient – I learned that on my “1st attempt”. It’s essential to macerate the fruits and candied peel in rum, bourbon or brandy for 12 hours. If you don’t want to use alcohol, fruit juices such as orange or pineapple are great options – I use both, alcohol and fruit juices.
 
Before transferring the cake in the oven, I like to place a baking dish on the lower rack filled halfway with hot water and to make the transfer easier, I place it on a baking sheet. Why do that extra step? The water will create some moisture therefore preventing the top of the cake from cracking by expanding too quickly. It’s a method I also like to use when I make cheesecake or sponge cake. If the cake is browning too fast, place a sheet of foil on top of it to prevent from burning.
 
Another important step after baking this delicious Holiday Fruitcake in the oven on low temperature for 3 hours is to nurture it for a few months. What I mean by that is after the cake is done, you either pour your chosen alcohol (stick to the same one… I use rum) over the baked cake and/or inject it in the cake. You don’t have to do it at all but I’m telling you, it gives an amazing flavor to this dessert. Make sure to wrap it properly with plastic wrap and aluminum foil after each “booze treatment”.
 
When it comes to decorating, it’s a personal choice. Before it goes into the oven, I like to place glazed cherries around the edge, alternating the colors. Then I place pecan halves in another circle inside the first one and finish off with more cherries in the center. Some of you might want to skip the fruit-nut topping and opt for either a buttercream frosting, bring a British flare to it by covering in marzipan and then royal icing, or simply using fondant… again, it’s your cake and your choice!
 
For this coming Christmas, surprise your loved ones with this incredibly delicious homemade Holiday Fruitcake! If you think this is gonna be just like your grandma’s fruit cake… it’s definitely not!
Bon Appétit!
 
Check out these other delicious sweet Holiday recipes…
– Sucre à la Crème • Butter & Cream Fudge
– Panettone
– Black Forest Cake
– Oliebollen
– Spicy Holiday Chocolate Bark
– Pavlova
– Chocolate Rum Snowballs
and for even more dessert recipes, click on this link… Recipe Category • Dessert


For ingredient amounts, directions and much more, visit https://clubfoody.com/cf-recipes/holiday-fruitcake/


Tuesday, October 19, 2021

Filet-O-Fish Sandwich Recipe • A Delicious Copycat! | Club Foody


My parents didn’t raise us with fast food – everything was pretty much homemade. Once in a while my mother bought prepared foods like Hamburger Helper, frozen Chicken Pot Pies, or those Oven Baked Beans that came in an amber jar. Once or twice a year, my father was either buying a big bucket of KFC with fries, Coleslaw with Pasta & Potato Salad or taking us to Chinatown located in downtown Montréal. On very rare occasions, we went to Harvey’s or Ponderosa Steakhouse. Again, they did prefer serving us homemade food which tasted much better anyway!
 
Back in the 70s’, McDonald’s launched the “Happy Meal” that went viral with young people. Parents were “happy” too because it wasn’t expensive plus the kids loved it as it not only came with a small burger and small fries but also cookies and a toy were in those cute little boxes. My brother Daniel loved it and that “promo” hooked him to this fast food chain until his late teens.
 
My first experience at McDonald’s wasn’t anything fantastic. Already a foody hiding in the closet, I disliked their burgers until I tried one item… the Filet-O-Fish Sandwich! I liked it but still, it wasn’t my cup of tea to go out of my way to have one.
 
When David and I just started our lives together, we went to McDonald’s on a road trip and had a very bad experience – never went back. Several years later, I actually craved a Filet-O-Fish Sandwich and decided it was time for me to make one at home. My first attempt was pretty decent… I just needed to work on my breadcrumbs. The next time I made it, it turned out perfect, actually it was even better because I knew exactly what the ingredients were – from my homemade Brioche Buns although you can always use Hamburger Buns instead to the kind of fish I chose, my delicious Tartar Sauce along with my French Fries. Even David, who never really liked this sandwich, was devouring it… Score!
 
Here are a couple of things I’d like to point out. When it comes to breadcrumbs, I lightly toast them in a small skillet for about 4 to 5 minutes. The crumbs will get darker when baked in the oven. Now, let’s talk about the fish… If you want a nice moist and flaky fish, an important step to do before cooking it is to pat it dry with paper towels. This little step prevents the texture from getting mushy and tough. It applies not only when making a Filet-O-Fish Sandwich but every time you handle fish including scallops.
 
Making a Filet-O-Fish Sandwich is easy plus you know your ingredients are fresh. Another bonus for making it at home is it’s cost effective… you’re saving money! If you’re not a “fast food junkie” but occasionally enjoy this sandwich, you’ll definitely love it more with this recipe…
Bon Appétit!
 
Check out these other delicious sandwich recipes…
– Croque-monsieur Montréal Style
– Mexican Chicken Sub
– Moo Shu Pork Tortillas
– Grilled Brie, Ham & Pear Sandwich
– Shrimp Po’ Boy
– Hawawshi
and for even more sandwich recipes, click on this link… Recipe Category • Sandwiches


For ingredient amounts, directions and much more, visit https://clubfoody.com/cf-recipes/filet-o-fish-sandwich/


Don’t forget to subscribe to our YouTube channel by clicking on this link… Club Foody YouTube