I never thought that one day I would be a “canning” enthusiast. It all started a few decades ago simply because I missed my mother’s jams, jellies, and pickles while I was living in Toronto. Although it was only a 5 hour drive 🚗, my schedule didn’t permit me to visit as often as I would like. Push comes to shove, I had to learn how to duplicate my mom’s canning recipes!
Of course, I started with the “easiest” canning recipe which was Bread & Butter Pickles then continued with more pickle recipes until I felt comfortable enough to move on to making jam and jelly. My first attempt was Raspberry Jam and surprisingly, I did pretty good – let’s be honest here… I kept my mother on the phone 📞 until it was done, lol! After that, I made more and more jams and jellies especially when certain produce was in season.
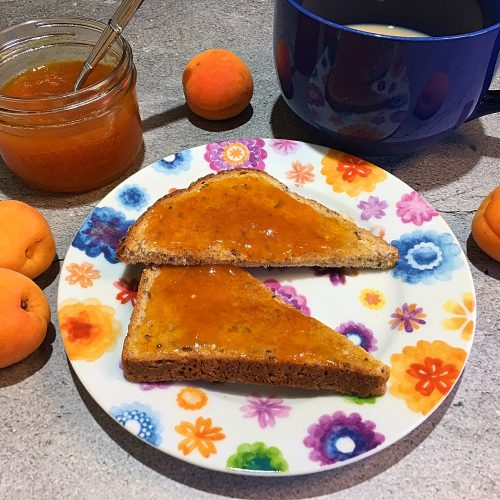
From July until mid-August, there’s a fruit I really enjoy and you bet, I took advantage of that short window by canning it… it’s Apricot Jam! Sweet and flavorful, this is a perfect condiment for your morning breakfast toast or croissant 🥐 as well as an ingredient for other recipes. I can use it in my Asian Pork Tenderloin, Baba au Rum, Roast Duck with Apricot and Thyme, Apricot Tart, Middle East Lamb & Apricot Tagine, plus many more
This recipe is easy… There are only a few ingredients and it takes just 15 minutes to cook ⏳, another 10 minutes of processing in a boiling water bath and 12 hours of passive time. One ingredient I like to use that is unorthodox is orange liqueur. It amplifies the taste. Can you skip it? Sure, if you want to avoid the alcohol but let me tell you, it’s so worth it!
When making Apricot Jam or any other fruit preserve, there’s air in them and once the mixture starts boiling, that’s what causes foaming. You’ll notice it right away as the texture and color is different from your actual mixture. There are a few reasons why it’s important to skim it off…
By omitting skimming the foam off, the recipe will be incorrect and lean to prevent your jam from setting up. Foam is trapped air bubbles so when it comes to leaving headspace, your measurement will be off. When processing, the foam will escape from the jar and the headspace with go down, giving you more space than you should have. This will result in an improper seal which might possibly increase mold during storage, plus it will make your jam look dull and off-color.
Another important step I do to make sure the mixture is thick enough is I use the spoon 🥄 test. After letting it sit in very cold water then drying it off, I dip it in to get a bit of jam, let it cool off and then flip it – if it runs very slow, it’s set otherwise, I cook it a little longer. Another way is to run your finger on the back of the spoon and if the line stays separate, it’s good to go!
To me, Apricot Jam is a “summer gem” 💎! When they’re on my supermarket shelves, I simply have to make a batch that should last for a while. It’s a nice versatile condiment to enjoy for breakfast but also for other recipes. It also makes awesome gifts 🎁 for your foody friends!
Bon Appétit!🍽
P.S. If you’re new at canning, here’s a great tutorial How to do Home Canning
Here are more incredible canning recipes for you to try… 😀
– Plum Jam
– Sweet & Savory Homemade Ketchup
– Mint Jelly
– Black & Blue Jam
– Homemade Sweet Relish
– Mint Jelly
– Strawberry Jam with Orange Zest
– Pickled Ginger
and for even more canning recipes, click on this link… Recipe Category • Canning
For ingredient amounts, directions, and much more, visit https://clubfoody.com/cf-recipes/apricot-jam/
Don’t forget to subscribe to our YouTube channel by clicking on this link… Club Foody YouTube


No comments:
Post a Comment