Tuesday, April 30, 2024

Pirate Peanut Butter Cookies Copycat Recipe | Club Foody


As years go by, manufacturers think we’re just a bunch of “sleep walkers” and we don’t realize that they keep cutting quality, amounts and sizes. They like to jack the prices up too 📈! Certain food items I really enjoyed back then that now taste like sawdust! On top of everything, there are preservatives and other chemicals that are so not good for us!
 
For these reasons, I’ve been making 👩‍🍳 more and more of my favorite foods from scratch. I think of Hamburger HelperFrench Vanilla Coffee CreamerHerb & Butter RicejamsOrange Juliusice creamsOnion Chip DipFilet-O-Fish SandwichSwedish MeatballsLemon Iced TeaGyoza, and the list goes on…
 
Another one that I added to the list about 5 years ago is Pirate Peanut Butter Cookies Copycat! Not very difficult to make, these cookies are far superior to the ones from the store plus there’s some seriously tasty filling! These sweet treats really taste like peanut butter not some industrial “blah” flavor 🥱!
 
Just like Jamie Oliver and his war against fast food chains using fillers & other harmful ingredients, mine is against the manufacturers! Besides Fig Newtons Cookies and Chocolate Chips Cookies 🍪, I will continue duplicating recipes plus make them taste even better!
 
Before becoming a brand under Nabisco (National Biscuit Company) acquired in 1928, Christie, Brown & Co. was a Canadian 🍁 bakery founded back in 1853 in Toronto. Its slogan was – “Mr. Christie, you made good cookies!”. Among their cookies, there was one with a combination of oatmeal and peanut butter… I’m sure you can guess which one I’m talking about!
 
This Pirate Peanut Cookies Copycat recipe is one of our favorites 💖! After the dough is made and baked, it’s a breeze to assemble them with that delicious filling. There are a few points I would like to highlight so the end results are flawless…
 
As much as natural peanut butter is somewhat healthier, do not use it! First, the natural one has no salt 🧂 or very little depending on the brand and is unsweetened. Second is the texture. The regular peanut butter has hydrogenated vegetable oil which helps when cooking under high temperature versus the natural ones. The regular has a nice smooth texture while the natural is slightly grainier.
 
After the dough is made, I portion my dough onto two large prepared baking sheets. I use a Zeroll portion scoop and its number is #70. Its size is not quite a tablespoon 🥄. To be precise, it’s 14 grams or .49 ounce. I like using it because the portion gives me exactly 24 cookies… not 23 or 25.
 
The next step makes the cookies look nicer… 🤩 Yeah, okay, I admit it, I’m a perfectionist!
Later when cooled off on the wire rack, I like pairing my cookies according to the same size and shape for a beautiful end result. After they’re all matched up, I use the same portion scoop as earlier, place the filling on the bottom from a pair, take the other half, gently place it on top and twist it back and forth to get an even thickness from end to end.
 
From there, I transfer them to the fridge for 1 hour ⏰ to harden so they’re less messy to eat. Remember, there’s butter plus melted peanut butter in them. I then place them in an airtight container and back to the fridge for up to 6 days… if they last that long!
 
This Pirate Peanut Butter Cookies Copycat recipe is the perfect delicious reason why everyone should make them from scratch. Step away from your computer 💻 or iPhone, roll up your sleeves and spend some quality time in the kitchen. Both your health and wallet will thank you…
Bon Appétit! 🍽
 
Here are more delicious homemade cookie recipes for you to enjoy… 😀
– Powerhouse Cookies
– Spicy Gingerbread Cookies
– Butter Pecan Cookies
– Thumbprint Cookies
– Biscotti
– Oatmeal Apple Cookies
and for even more snack recipes 🍭, click on this link… Recipe Category • Snacks


For ingredient amounts, directions, and much more, visit  https://clubfoody.com/cf-recipes/pirate-peanut-butter-cookies-copycat/


Don’t forget to subscribe to our YouTube channel 📽 by clicking on this link… Club Foody YouTube
 

Pirate Peanut Butter Cookie Copycat


Thursday, April 25, 2024

Kansas City BBQ Sauce Recipe • Sooo Good! | Club Foody


If I can compare April to another month, it would be November. The month before the Holidays 🎄, I bake cookies and bread like BiscottiGingerbreadPanettone besides making some main courses for instance Pork Stew with Meatballs ~ Ragoût de Boulettes & Pattes de CochonTourtières, and so on.
 
April is another insanely busy month. You might wonder why. It’s very simple… I’m getting ready for BBQ season 🔥! I make sausages like merguezgarlichot Italian, etc., then rubs such as Fish RubSmoky BBQ RubKansas City Dry Rub, and others. I ensure my spice jars are filled and also my barbecue sauces are done.
 
I have a few incredible sauces in my repertoire. I think of Caribbean BBQ Sauce or BBQ Sauce for Chicken, my famous TeriyakiSmoky BuffaloSpicy Strawberry Orange Sauce, and so on. Today, I’m sharing another incredible one and it’s my Kansas City BBQ Sauce!
 
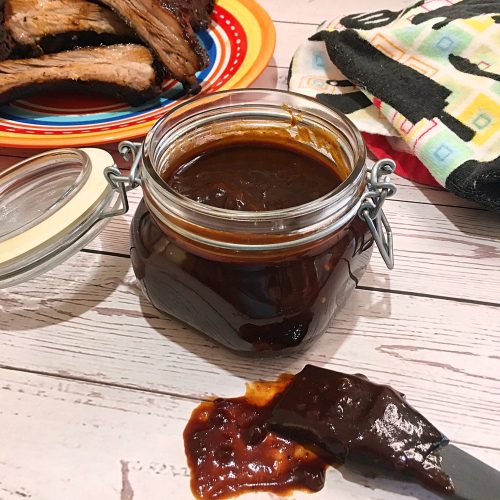
This condiment is undeniably tasty 😋! With a great blend of ingredients and seasonings, this has enough zip without being spicy. There’s a beautiful harmony of sweetness, tanginess and spiciness resulting in a nice rich, thick sauce.
 
There’s an immense reward when making 👩‍🍳👨‍🍳 homemade food and the same applies with this Kansas City BBQ Sauce. By making it from scratch, there are no preservatives plus it always tastes fresh. It keeps very well in the fridge for up to 2 months.
 
You’ve probably heard the saying “slow like molasses” before 🐢. Well, it doesn’t have to be when dealing with this ingredient or any others that are sticky. I have an amazing trick that remedies the aggravation and it’s this one… Measuring Honey, Syrup or Molasses without Sticking!
 
Made with a ketchup-base along with dark molasses, brown sugar, mustard along with others, this Kansas City BBQ Sauce is outstanding! Perfect for your grilled foods, it can also be a base for your pizza 🍕 too! Better than any commercial brand out there, you’ll be deliciously surprised by its taste!
Bon Appétit! 🍽
 
Check out these other great sauce recipes… 😀
– Tamarind Sauce
– Sauce Robert
– Mango Pineapple Sauce
– Soubise Sauce
– Sweet Chili Sauce
– Ethiopian Red Pepper Sauce
– Homemade Dijonnaise
and for even more sauce recipes, click on this link… Recipe Category • Sauces & Marinades


For ingredient amounts, directions, and much more, visit  https://clubfoody.com/cf-recipes/kansas-city-bbq-sauce/


Don’t forget to subscribe to our YouTube channel 📽 by clicking on this link… Club Foody YouTube
 

Kansas City BBQ Sauce


Tuesday, April 23, 2024

Caribbean Style Fish Stew Recipe • Light & Tasty! | Club Foody


With Club Foody in our lives, I cook and bake 👩‍🍳 constantly while David washes a pile of dishes – I’m such a lucky lady that my husband helps me! The ideal is when I make one of my one-pot recipes! It’s easy on both of us… the camera stays in one spot and my spouse can relax.
 
On the site, there are so many recipes to choose from such as Moules (Mussels) à la ProvençaleCouscous with Andouille & Shrimp 🍤, Cauliflower Fried RicePaella de MariscoLamb Keema, and more. Among them, here’s another delightful one to add to the list… my Caribbean Style Fish Stew!
 
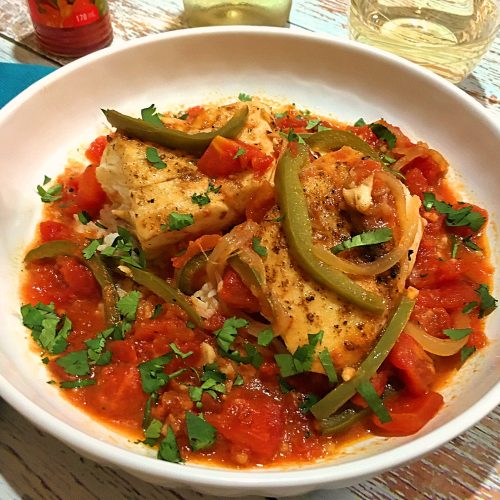
This recipe is simply amazing! With a delicious blend of fresh produce along with seasonings, this easy one-pot meal is undeniably flavorful! Slowly simmered in a gorgeous tomato-based sauce 🍅, this fish dish is perfect to enjoy with crusty bread as a side.
 
This tasty and bright stew is pretty straight forward. After seasoning the fillets cut into medium sized pieces – either red snapper or cod are a great choice – with salt 🧂, pepper and my fish rub, they’re quickly cooked in oil and butter until just golden and set aside until needed.
 
From there, onions 🧅, green peppers, ginger and garlic 🧄 are sautéed in the same skillet. To make this Caribbean Style Fish Stew more authentic, I use Caribbean Pepper Sauce which can be easily found in the international aisle of your supermarket.
 
Some use Scotch bonnet peppers instead. I personally prefer using the Pepper Sauce. Then a can of diced tomatoes are added to the mixture before pouring in some chicken broth and freshly squeezed lime juice. It takes about 30 minutes ⏰ to a cook all together and 10 minutes to prep – I’m pretty fast with my knife so it takes me less than 5 minutes to prep everything…
 
This Caribbean Style Fish Stew is an ideal one-pot meal to make on weeknights! It’s also light with tons of flavor 😋 without being overly spicy. Incredibly delectable on its own, this dish is even better served with crusty bread, roti or rice so you can sop up the yumminess of the rich sauce…
Bon Appétit! 🍽
 
Here are several more amazing one-pot recipes for you to enjoy… 😀
– Texas Cowboy Stew
– Thai Red Curry Shrimp
– Coffee Beef Stew
– Arroz con Pollo
– Moroccan Kefta Tajine
– Pork Vindaloo
– Pumpkin Chili
and for even more fish recipes 🐟, click on this link… Recipe Category • Fish & Seafood


For ingredient amounts, directions, and much more, visit  https://clubfoody.com/cf-recipes/caribbean-style-fish-stew/


Don’t forget to subscribe to our YouTube channel 📽 by clicking on this link… Club Foody YouTube
 

Caribbean Style Fish Stew


Friday, April 19, 2024

Inkbird Sous Vide ISV-101W Review + Pork Loin Chops Recipe | Club Foody


A few weeks ago, I was approached by INKBIRD, a high-tech company that has been devoted to offering excellent smart home products. Established in 2010, they have been manufacturing great products like temperature controllers, food and smoker thermometers, sensors plus much more.
 
In 2019, the company started making sous vide cookers. Producing these outstanding appliances, they contacted me to test and review one of them which is their INKBIRD Sous Vide ISV-101W. As I’ve never used one before, I was quite honored and gladly accepted.
 
The Sous Vide cooking method has been around for a long time. Back in the 70s’, a French chef by the name of Georges Pralus invented a way to slowly cook food for hours 🕖 at low-temperature. Using a water bath kept at a constant temperature, the food is placed in a plastic bag and cooked for 1 to several hours, even days. It helps to retain moisture without overcooking the outside.
 
With its high-technology, the INKBIRD Sous Vide ISV-101W is the ideal way to get the best from this cooking method. With a 2-inch wide-angled TFT screen located on top of the cooker, temperature and hours can be set along with other convenient features.
 
There are a multitude of settings available. One of them is the target temperature and the cooking time on the quick-cook setting along with a built-in scheduler. It allows you to start cooking your food on a certain day/time and be ready later on or the next day. At any moment, you can start and stop the cooking process.
 
This INKBIRD Sous Vide ISV-101W is extremely precise when it comes to temperature control. With an accuracy of .1ºC or .3ºF, there’s no chance of over or under cooking your food. There’s also a generous range of temperatures from 0 to 90ºC or 32 to 194ºF to let you cook a range of different foods.
 
A feature that I find extremely useful is there’s built-in settings according to the food you’re cooking like beef 🐂, poultry, pork, seafood 🦞, vegetables, etc. In each category, it gives a selection to choose from, including the thickness. Simply select and press set. This feature helps you get cooking with your INKBIRD Sous Vide ISV-101W with ease.
 
What makes this an amazing appliance is your food can be cooked wirelessly. It comes with a small booklet on how to set it up with your iPhone or Android. The instructions are pretty straight forward and it takes just a few minutes to sync it… perfectly suitable for our busy lifestyles!
 
Anyone can get distracted and the beauty of this sous vide cooker is that it has several safety and reliability features built-in including an alarm 🔊 when the temperature is reached as well as when its finished cooking. There’s also a maximum and minimum water level shut off mechanism.
 
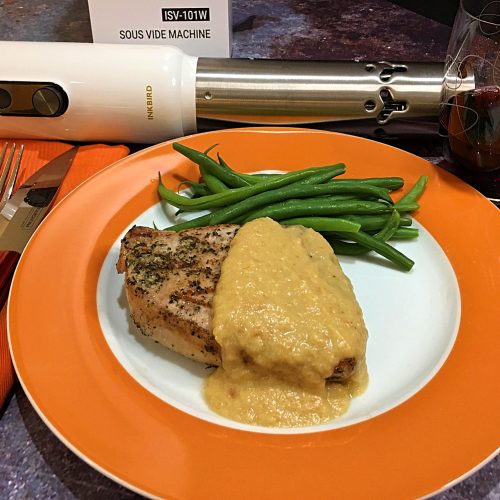
Since I received my INKBIRD Sous Vide ISV-101W, I’ve been experimenting with a few recipes and the results are incredible! To help you get familiar with this appliance, I’ve decided to show you how to prepare Pork Loin Chops 🐖 along with a few tips to achieve delicious results!
 
To begin with, my chops were about ¾-inch thick therefore I set up my temperature to 140ºF/60ºC for 1 hour to get to medium-rare. I could’ve gone for up to 3 hours. The way I calculate it is 25 minutes per ½-inch and round it up to an inch thick. As pork is a dense meat, I add another 10 minutes.
 
If you prefer yours medium, increase the temperature to 150ºF/66ºC. When it comes to bone-in pork chops of ¾-inch thick and I want them medium-rare, I cook them for 1:30 hours at 140ºF. It will take longer because the meat surrounding the bone will be a few degrees cooler than the rest.
 
Besides the thickness, another aspect to consider is the weight and overall size. The thicker and bigger around the chop is, the longer it will take to cook. While they’re in the water bath cooking, use a thermometer to verify the desired doneness before removing them.
 
I seasoned the meat! First, I don’t pat dry the chops. Second, I season with salt 🧂 and pepper plus my Herbes de Provence although other seasonings, herbs and spices can be used. Lastly, when I place them in the re-sealable plastic bag, I add just a little bit of olive oil to make them moister.
 
By the way, I don’t own a vacuum-sealer… yet – it’s on Santa’s list 🎅! If you’re like me, you’ll be using re-sealable plastic bags. I use freezer bags because they’re thicker therefore there’s less chance of breakage while cooking.
 
If you own a vacuum-sealer, this won’t apply to you…
After placing the meat in the re-sealable bag, close it almost all the way, leaving a small opening on one side. Slowly immerse the bag in the water. The pressure of the water will force the air out through the top of the bag. When the bag reaches the water line and the air has been pressed out, seal the bag.
 
Using either a vacuum-sealer or re-sealable plastic bags, it’s very important to completely submerge the meat or other food in the water bath otherwise it won’t cook evenly. The consistent temperature circulating around the immersed food is what gives uniform results.
 
As you’ve heard me say many times “we eat with our eyes first” 👀. Well, the color of the chops will be white with next to no color… not very appealing therefore, we’ll finish them off on the barbecue or in a cast iron pan.
 
The process is extremely fast. As the meat is already cooked, it just needs some nice grill marks on them. I bring the BBQ’s temperature to 450ºF 🔥 or high heat when it comes to the stovetop – add some vegetable oil to the cast iron pan. Depending on the thickness, it should take just a few minutes per side including the edges.
 
I rest the meat for a few minutes before serving. In the video, I paired my pork loin chops with my Soubise Sauce. When the meat is slowly cooking, this is when I take the opportunity to make my sauce… the timing is always perfect!
 
Using the INKBIRD Sous Vide ISV-101W, is a foolproof way to give you juicy and tender pork chops every time. The meat will come out evenly cooked from end to end.
 
It comes in white or orange along with a one-year warranty, you can purchase the Inkbird Sous Vide ISV-101W at Amazon.ca (link below).
Bon Appétit! 🍽
Click here to purchase the orange INKBIRD Sous Vide ISV-101W on Amazon
 
Here are more delicious pork recipes for you to try… 😀
– Pork Chops with Spicy Peach Sauce
– BBQ Pork Ribs
– Croquetas de Jamón • Ham Croquettes
– BBQ Pulled Pork Pizza
– Homemade Andouille Sausage
– Chinese 5 Spice Spare Ribs
– Pork Schnitzel
and for even more pork recipes 🐖, click on this link… Recipe Category • Pork


For ingredient amounts, directions, and much more, visit  https://clubfoody.com/cf-recipes/inkbird-sous-vide-isv-101w-pork-loin-chops-recipe/


Don’t forget to subscribe to our YouTube channel 📽 by clicking on this link… Club Foody YouTube
 

Inkbird Sous Vide ISV-101W Review


Thursday, April 18, 2024

Green Bean Mushroom & Almond Casserole Recipe | Club Foody


Since childhood, my brother and I always ate our vegetables. The rare time we didn’t like something, there was no choice… we had to eat it, period! I’m actually shocked to see “picky eaters” getting away with it! Parents should be stricter about it so children can have great, healthy 💚 food in their system.
 
My mother made a rotation of different veggies and fruits for a healthy diet. Besides being a great source of fiber, they contain important vitamins and minerals. They lower heart disease 💖 and blood pressure, improve digestion, protect against cancer, etc.
 
A delicious way to have your “picky eaters” eat more produce is to disguise the way of serving it. One of them is making casseroles 🍲. I think of Caponata, Autumn Veggie Casserole, Broccoli & Cauliflower Casserole, Onion Soufflé, Vegetable Tian, Loaded Potato Casserole, and many others.
 
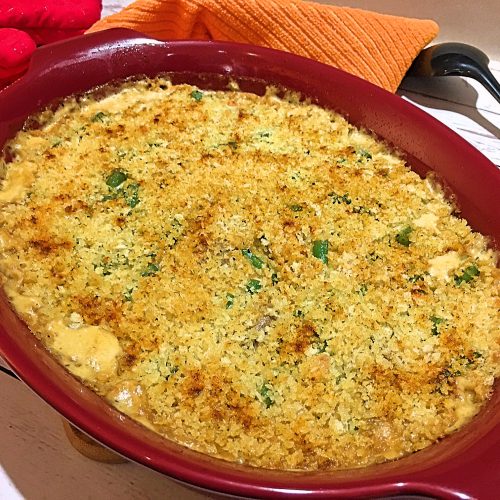
Another one that is amazingly tasty is my Green Bean Mushroom & Almond Casserole! This recipe is so delectable! With a gorgeous mix of vegetables, this side is absolutely perfect for your proteins 🐓🐟🐖. Creamy and cheesy, this is a flavorful dish to make anytime!
 
Putting this recipe together is pretty fast ⏳ therefore it’s important to blanch the green beans prior to starting! It’s a quick way to stop the enzyme action, remove microorganisms, help to keep the flavor, brighten the color plus preserve nutritional value. To learn how to blanch them, click here… Green Beans • How to Blanch
 
After they’re blanched, the beans are well drained and set aside while starting the recipe. The other vegetables are quickly sautéed in a skillet before making the sauce. I like to season it with my Herbes de Provence and some hot paprika… simple and yet enough to bring up the flavor 😉.
 
The mixture is transferred to a 3-quart baking dish greased with cooking spray. To make this Green Bean Mushroom & Almond Casserole tastier, a topping made with breadcrumbs mixed with melted butter is spooned over. The final touch is sprinkling on some mild paprika… it’s visually more appealing – remember, we eat with our eyes first 👀! It’s baked in the oven for 20 minutes or until bubbly.
 
This Green Bean Mushroom & Almond Casserole is another delicious side that everyone in your family will enjoy including those little “picky eaters” 👱‍♂️👧! It pairs beautifully with many proteins and is perfect to serve anytime including special occasions and holidays…
Bon Appétit! 🍽
 
Here are several more casserole recipes for you to enjoy… 😀
– Lasagna Roll Ups
– Chicken Divan
– Lancashire Hotpot
– Pierogi Casserole
– Cod au Gratin
– Turkey Tetrazzini
– Southwest Beef Casserole
and for even more side dish recipes, click on this link… Recipe Category • Vegetables & Sides


For ingredient amounts, directions, and much more, visit  https://clubfoody.com/cf-recipes/green-bean-mushroom-almond-casserole/


Don’t forget to subscribe to our YouTube channel 📽 by clicking on this link… Club Foody YouTube
 

Green Bean Mushroom & Almond Casserole