Thursday, April 17, 2025

Pistachio Crusted Rack of Lamb Recipe • So Elegant! | Club Foody


When my brother and I were children, my parents prepared food using a wide variety of proteins so we don’t turn into “picky eaters”. We had the usual which were chicken, turkey, beef, pork, as well as the ones from the sea 🦞 and fresh water.
 
After I moved out on my own in my early 20s’, my adventurous culinary side went wild. I’ve been trying meat that we (my brother is the same as me) didn’t have at home like duck 🦆, lamb, ostrich, bison, venison, rabbit, alligator, etc.
 
One that can be a little gamey at times is lamb. With its distinct flavor, many are turned off 😖 from it. David is not a big fan of lamb therefore I always make sure to buy the protein from North America (more info below) and also bring some serious flavor to the dish.
 
I’ve posted over a dozen lamb recipes on the website such as Bobotie, Greek Dolmades with Avgolemono Sauce, Cassoulet, Mediterranean Leg of Lamb, African Lamb Tagine, Pastitsio, Lancashire Hotpot, Lamb Ragù, and many others. Here’s another one to add to this yummy list 📑… Pistachio Crusted Rack of Lamb!
 
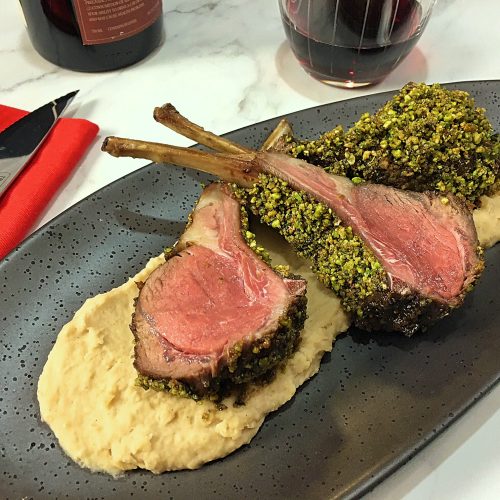
This elegant recipe is perfect when entertaining! It’s colorful 🌈, delicious, makes a beautiful presentation, and above all, it’s quick and easy! It takes 30 minutes from start to finish unless the racks are prepared ahead and only need to be roasted which makes it even faster, ideal when guests are over.
 
This Pistachio Crusted Rack of Lamb is gorgeous! To save time, I buy the racks already frenched. After searing them, they’re transferred to the oven and roasted for 8 minutes ⏰. After that, Pomegranate Molasses is brushed on then the racks are coated in the pistachio crust and back in the oven.
 
When it comes to the pistachio crust, it’s important that it’s processed until very fine so it can adhere better. In the video 🎥, I didn’t and regret it! To make the mixture moist, a little oil is added to it, enough to resemble damp sand.
 
After they’re coated, the racks go back to the oven for 5 to 8 ⏳ minutes or until the internal temperature reaches 135ºF for medium-rare although lamb is normally served more on the “pinky” side with an internal temperature of 125ºF. David and I prefer medium-rare but cook them to your liking.
 
Let’s talk about the difference between lamb 🐏 from Australia versus North America…
It’s about feeding. The Aussie ones are raised and grass-fed on open pasture, giving that “gamey” taste. The North American producers are still raising them on grass but finish them on grain which makes them milder. Also, the Australian ones are leaner in comparison to ours.
 
As this protein becomes more popular here in Canada and the United States, this Pistachio Crusted Rack of Lamb is perfect to serve for any special occasion! With its colorful and tasty crust, this is certainly a lovely recipe to add to your folder 📁!
Bon Appétit! 🍽
 
Here are more elegant recipes for you to try… 😀
– Duck Breast with Blood Orange Sauce
– Scallops with Smoky Cream Corn Sauce
– Torta Pasqualina • Easter Pie
– Moroccan Kefta Tajine
– Stuffed Pork Tenderloin with Spinach Ham & Cheese
– Lobster Newberg
– Red Wine Braised Short Ribs
– Sole Meunière
– Steak Oscar
and for even more lamb recipes 🐏, click on this link… Recipe Category • Lamb


For ingredient amounts, directions, and much more, visit ➡ https://clubfoody.com/cf-recipes/pistachio-crusted-rack-of-lamb/


Don’t forget to subscribe to our YouTube channel 📽 by clicking on this link… Club Foody YouTube
 

Pistachio Crusted Rack of Lamb


Tuesday, April 15, 2025

Mango Cake Recipe • A Scrumptious Dessert! | Club Foody


Easter is right around the corner. Besides Christmas 🎄, this is my second favorite Holiday! It’s the turning point from cold to warmer weather… finally! Other reasons are its significance, its pretty pastel colors and of course, spending some family time especially when it comes to Easter egg hunting for the little ones…
 
With bunnies and little chicks 🐣, this is a great occasion to gather with loved ones and make a nice dinner. If you’re hosting, you’ll end up making a scrumptious dessert. It can be a Carrot Cake, Lemon Meyer Cake, Cheesecake, Lavender Cupcakes, Lemon Meringue Pie, Hummingbird Cake, and so on…
 
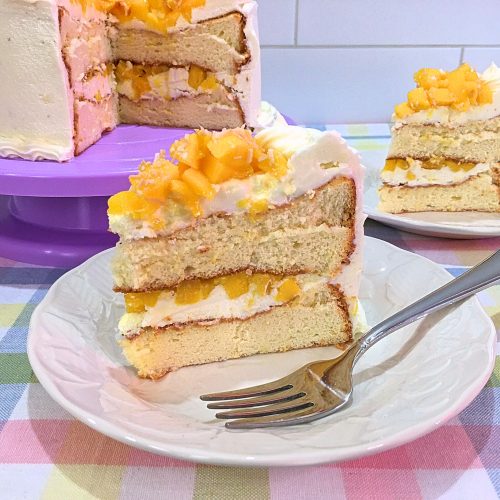
Another one that originated from the Philippines 🌏 and is incredibly delicious is Mango Cake! Made with a nice sponge cake along with a mango filling and wrapped up with a beautiful creamy Cream Cheese Frosting, this is the ideal dessert for Easter!
 
It’s not a complicated recipe but it takes time ⏰ particularly for the making of the cake. It’s technical, that’s all! To get that light, fluffy and airy texture, you have to follow each step and not rush anything. Just like chiffon and angel food cakes, sponge is delicate and needs some attention to details…
 
First, the flour has to be sifted and measured 📏. I like using self-rising flour because of the added leavening agent but many will use cake flour instead with its low protein content and milled into a superfine consistency.
 
However, when I add sifted self-rising flour to my egg yolk mixture, I sift it once again. Doing it twice adds more air to the flour which means the texture of the cake 🍰 will be lighter and fluffier. If using cake flour, you don’t have to sift it twice.
 
Before integrating the flour into the yolks, they have to be whisked properly. After adding granulated sugar and toasted coconut flakes 🥥, the yolk mixture has to become thick and fluffy, its color turning to a light yellow, and when lifting the whisk from the bowl, the batter falls back in a ribbon.
 
After they’re done, the sifted flour is added by batches through the sifter (no need if using cake flour), mixing well between each addition. By the time the flour is all in, the batter will get very thick therefore, add a little milk 🥛, just enough to finish mixing the batter properly. Don’t go beyond ½ tablespoon.
 
Now the egg whites…
The whites 🥚 as well as cream of tartar are added to the bowl of a stand mixer and processed until soft peaks form before adding the remaining sugar. Why adding cream of tartar? It stabilizes the whipped egg whites, keeping the air bubbles stable and also helps the cake to rise.
 
When the granulated sugar is all in, we continue whipping the egg white mixture until stiff peaks form before adding it, by batches, to the batter (egg yolk mixture). Take your time to fold 🥄 them in gently until nicely incorporated – don’t knock out the air bubbles!
 
We’re now ready to transfer the batter into cake pans BUT that too, is different from regular cakes. The bottoms of the cake pans are lined with parchment paper rounds that are lightly greased 🧈 while the sides are NOT! Why’s that?
 
The ungreased sides help the batter to rise and for the cake to get structure. If the sides are greased, then the batter will slide down and the cake will collapse. It needs to grip onto the sides in order to achieve the tall, fluffy cake 💭 we’re looking for!
 
When placing the parchment rounds, make sure to smooth them out to prevent the batter from getting under it. If you’re not familiar on how to make them, click on this link 💻 for a quick tutorial… Parchment Paper Rounds for Cakes
 
Carefully, transfer the cake pans onto a wire rack after being baked. Let them cool partially for 20 minutes ⏳ before inverting them onto the wire rack. The reason why we flip the cake pans is to maintain their height. By cooling them upside down, the gravity prevents the center from sinking. This also applies to chiffon and angel food cakes.
 
While they’re cooling, make the Cream Cheese Frosting. It’s exactly the same recipe except, for this Mango Cake application, pure coconut extract is used instead of vanilla extract. If using other cake flavors 🍊, you might want to switch for a different extract.
 
Next step is to assemble the cake…
If the cakes have to be leveled out, use a serrated knife 🔪. After spreading out about ½ cup of the frosting or enough to cover, half of the diced mangoes is spooned over in a single layer. The second cake is placed on top before entirely covering the cake with the frosting, keeping some to make the rosettes.
 
David is the expert when it comes to piping. The rosettes are piped all around the outside edge on top of the cake. He’s using a 1M but any other large star ⭐ piping tip will do. If you like, pipe some frosting around the cake at the bottom with the same tip… it makes a nice presentation.
 
The rest of the mangoes 🥭 are neatly spooned into the center, making sure to keep the rosettes intact. For the finishing touch, some toasted coconut flakes are sprinkled over the fruit and not on top of the rosettes. If you’re not to sure how to prep mango, click here… How to Cut a Mango
 
Easter 🐰 is bright, with gorgeous pastel colors. Although I make this dessert throughout the year, this Mango Cake fits perfectly for the occasion! Don’t let the steps stop you from making this scrumptious dessert… it’s so worth it!
Bon Appétit! 🍽
 
Check out these other scrumptious cake recipes… 😀
– Chocolate Beet Cake
– Tropical Pineapple Upside Down Cake
– Red Velvet Cake
– Cranberry Orange Bundt Cake
– Black Forest Cake
– Orange Flan
– Lamington Cake
– Blueberry Cake
– Coffee Cake
and for even more dessert recipes 🍰🍩, click on this link… Recipe Category • Dessert


For ingredient amounts, directions, and much more, visit ➡ https://clubfoody.com/cf-recipes/mango-cake/


Don’t forget to subscribe to our YouTube channel 📽 by clicking on this link… Club Foody YouTube
 

Mango Cake


Saturday, April 12, 2025

Leftover Evaporated Milk Ideas - Tips & Tricks | Club Foody


Our parents always lectured us when we weren’t finishing our plates or when we were throwing food in the garbage. They were pointing out that many people around the globe 🌍 didn’t have the luxury of eating food every day, thus, we should be more respectful and thankful about our fortune.
 
It stays with me and I grit my teeth when I have to dump some in the bin. I’m blessed to have food in my fridge and able to eat every day. The cost of food is also involved. Everything keeps going up 📈 except our salaries and just that alone, should make everyone more interested in avoiding unnecessary waste.
 
On the website, I have many tricks and tips to reduce spoilage and throwing-away food. There’s Extending Shelf Life on Bean Sprouts as well as on Berries 🍓, Better Cheese Storage along with proper Freezer Meat Storage, salvaging Gravy or Tomato Paste, and dozens more.
 
In this episode, I’m bringing some Leftover Evaporated Milk Ideas. Often discarded and poured down the drain, there are so many ways of using what’s left in the can. The list 📑 is almost endless! It can be added in so many recipes, both sweet and savory.
 
First, it’s important to store the leftovers properly…
Whatever’s left in the can that is unused, has to be poured into a container, either plastic or glass, covered and transferred to the fridge. It’ll keep for up to 5 days after opening unless it’s stored in the freezer in an airtight container. In that case, it’ll be good for 1 ½ months 📆.
 
If you opt to freeze it, let it thaw out sitting in the refrigerator. This process can take up to a full day ⏰. When ready to be used, the leftovers might have separated. It’s not a big deal. Simply shake it until the consistency is smooth again.
 
Let’s see some Leftover Evaporated Milk Ideas…
Right off the bat, pouring some in your coffee ☕ or cup of tea is absolutely delicious! It’s a great enhancer with its rich and thick texture plus it adds some sweetness to it. In lieu of milk, use the leftovers when making your favorite smoothies.
 
You can turn it into a milk-like consistency. The ratio is 1:1 so as an example, mix a ¼ cup of evaporated milk with a ¼ cup of water 💦
and stir well. This is a good alternative to fresh milk that can be used in different applications.
 
I like using it in my batter when making Waffles or Pancakes 🥞! I find it makes these breakfast items fluffier. I make sure to not use more than half of the liquid needed but you can always use the full amount if you like.
 
To make Whipped Cream more interesting, freeze evaporated milk for 1 hour (it has to be extremely chilled), then whisk it until it makes soft peaks before adding powdered sugar and vanilla extract – just keep in mind that evaporated milk 🥛 is sweet so you might want to go easy on the sugar.
 
Here are more Leftover Evaporated Milk Ideas… Using it in soups 🥣, chowders and sauces adds richness to these dishes. Make Mac and Cheese texture creamier and the same applies to casseroles, giving them a gorgeous flavor.
 
Scrambled eggs and omelets can be sometimes a little dry. To prevent that from happening, add 1 tablespoon of evaporated milk per egg 🥚. This small amount will make these popular breakfast items texture fluffier, smoother and moister.
 
When it comes to desserts, it’s a no brainer… evaporated milk is a great choice! Besides using it in Tres Leches cakes/cupcakes 🧁, it’s a tasty addition to puddings, custards, beignets, pies, and so on. Other items it can be used in are fudge, scones, bread, etc.
 
This Leftover Evaporated Milk Ideas 💡 episode gives you a lot of possibilities for using it. Next time you are left with some, don’t waste it by pouring it down the drain, elevate the texture and flavor in other favorite recipes and dishes!
Bon Appétit! 🍽
 
Check out these other helpful kitchen tips and tricks… 😀
– Keep Moisture Out of Powdered & Granulated Foods
– How to Revive Stale Bread
– Extract the Most Juice from Citrus Fruits
– How to Store Celery for Weeks
– Grind Chicken & Save Money
– Secret for Better Grating Soft Cheeses/Butter
– Remove Tarnish from Silverware in 10 minutes
– How to do Home Canning
– Extend the Shelf Life of Parsley & Cilantro
and for more handy kitchen tips and tricks 💡, click on this link… Recipe Category • Tips & Tricks
 
Don’t forget to subscribe to our YouTube channel 📽 by clicking on this link… Club Foody YouTube


Thursday, April 10, 2025

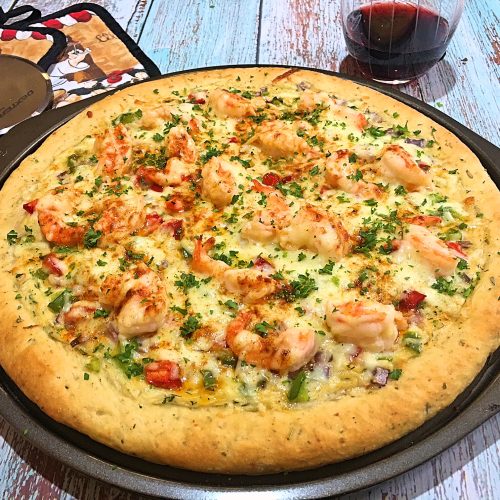
Shrimp Pizza Recipe • An Elevated & Tasty Pie! | Club Foody


Before I started making it from scratch, I was having pizza maybe twice a year. It was okay but somehow, I always found it either greasy, not enough ingredients and/or seasonings. Well, things have changed a lot since I rolled up my sleeves to make 👩‍🍳 homemade pizzas…
 
I would say that we have “pizza night” 🍕 at least once a month! It can be Hawaiian Ham Bacon Pizza, Greek Pizza, Meat Lovers Pizza, Sombrero Pizza, Pepperoni Pizza, and many others, as well as this one… Shrimp Pizza!
 
This pie is absolutely delicious! It has a gorgeous combination of ingredients that marry so well together! Using an adapted Béchamel Sauce as my base, vegetables, shrimp and cheese along with lemon zest and seasonings. It’s the perfect pie to enjoy at home 🏡!
 
It took me a few times to bring this Shrimp Pizza to where it should be. When I finally opt for my base sauce, the rest was a breeze. It’s basically a regular Béchamel except the milk 🥛 is reduced, freshly ground black pepper goes in instead of white and dill is added; salt and nutmeg are left out… they don’t belong in this recipe.
 
When it comes to the pizza dough, here are your options. Yes, you can buy 🛒 pre-made ones but homemade is the best. The ones I recommend for this recipe is either Easy-Cheesy Herb (that’s the one I use in the video), Rustic Italian or Mediterranean.
 
The pizza is baked in two stages. The first time it goes in the oven is with the vegetables topped with some Mozzarella Cheese 🧀; it bakes for 8 minutes. The second time is with the sautéed shrimp, lemon zest, more cheese and paprika. It only bakes for 5 minutes.
 
Let’s talk about the shrimp mixture…
When the color of the prawns turns from grey to light pink, it’s an indication that they’ve started cooking. That’s why they’re quickly sautéed for just 1 minute. They won’t be totally pink and opaque but it’s okay, they will be baked in a 500ºF oven for 5 minutes ⏰.
 
Colorful and delicious, this Shrimp Pizza recipe is a delight! The mix of tasty ingredients and of course, shrimp 🍤, will bring a new level of yumminess to pizza night! Here’s another delicious pie to try… Seafood Pizza
Bon Appétit! 🍽
 
Here are more delicious pizza & pasta recipes for you to enjoy… 😀
– Green Onion Pizza Dough
– Creamy Tortellini Boscaiola
– Italian Gnocchi Casserole
– Quattro Formaggi Pizza – Four Cheese Pizza
– Pastitsio
– Lasagna Roll Ups
– Best Foolproof Cauliflower Pizza Dough
– Baked Ziti
– Spaghetti alla Carbonara
and for even more pizza and pasta recipes 🍝, click on this link… Recipe Category • Pizza & Pasta


For ingredient amounts, directions, and much more, visit ➡ https://clubfoody.com/cf-recipes/shrimp-pizza/


Don’t forget to subscribe to our YouTube channel 📽 by clicking on this link… Club Foody YouTube
 

Shrimp Pizza


Tuesday, April 8, 2025

Lemon Drop Limoncello Martini Recipe | Club Foody


Back in the 80s’, shots and shooters became popular. There was B52, Slippery Nipple, Sex on the Beach, Kamikaze, Blow Job, Sambuca, Tequila Slammer, Orgasm, etc. Yes, many of these had sexual innuendo names 🙄 making them quite sought-after.
 
Another one that was also quite in demand back then was the Lemon Drop! It was more a lady’s shooter; I liked it! On the other hand, I’ve never been crazy having shots or shooters – I’m more of a social butterfly 🦋 and like sipping my drink slowly instead of consuming it in one gulp.
 
Being a bartender during that era, I turned this famous shooter into a Lemon Drop Limoncello Martini instead! It was an OMG 🤯! The taste was pretty similar to the one-shot drink except slightly elevated. This cocktail became trendy as many enjoyed the Lemon Drop but wanted to sip it slowly…
 
I’m a martini girl 🍸! It can be Banana Split, Blood Orange, Saketini, Blue Ice, Chocolate, Appletini, Dirty Dry, Pomegranate, Napoleon, Chocolate Grasshopper, Lychee, Espresso, Crantini, Melon, Spicy Martini, and the list goes on…
 
Back to the Lemon Drop Limoncello Martini…
The mix is slightly different from many out there. First, in the glass of a Boston shaker over ice cubes 🧊, I strain some freshly squeezed lemon juice through a fine sieve to catch the pulp. It’s not necessary but for a cleaner result, that’s the way to go. I personally don’t like seeing it floating in my drink.
 
Then the alcohol goes in: Limoncello and Vodka. When it comes to this Italian liqueur, you can make 👩‍🍳👨‍🍳 it from scratch by clicking right here… Homemade Limoncello Liqueur. It’s followed by Simple Syrup which can also be made at home. Here’s the link… Simple Syrup
 
After placing the metal tumbler on top, tap down to secure it and shake vigorously, the mix is strained into a martini glass coated with a sugar rim. Add a lemon twist or lemon wheel 🍋 and voilà, you’ve got yourself the BEST cocktail ever!!!
 
I love citrus and this Lemon Drop Limoncello Martini delivers perfectly! Easy and quick ⏳ to make, this elegant cocktail is refreshing and tasty plus it has a beautiful balance of sweet and sour. It’s a lovely drink to enjoy…
Cheers! 🥂
 
Here are more great cocktail recipes for you to try… 😀
– Cosmocello
– Spanish Sangria
– Golden Sunset
– Strawberry Mango Margarita
– Homemade Tia Maria
– Hurricane Cocktail
– Michelada • Mexican Beer Cocktail
– Manhattan Cocktail
– Coco Cognac
and for even more cocktail and alcohol-free beverage recipes 🧃🍹, click on this link… Recipe Category • Beverages


For ingredient amounts, directions, and much more, visit ➡ https://clubfoody.com/cf-recipes/lemon-drop-limoncello-martini/


Don’t forget to subscribe to our YouTube channel 📽 by clicking on this link… Club Foody YouTube
 

Lemon Drop Limoncello Martini